
 | ||
Introduction
This article walks through the "Leave for Other Users" feature, a tool that lets provisioned users submit Leave Requests on behalf of someone else. By the end of this guide, you'll know how to add Leave on another user's behalf, understand the permissions required to do so, and pick up a few hotkeys along the way to speed up the process.
A. Problem Statement
Susan is out sick today, and she's far too far gone to put in a request for the day off she so sorely needs. Previously, organizations with this issue had to wait for Susan to come back to the office so she could put in a past-dated Leave Request. Now, with the "Leave for Other Users" feature, provisioned users can create Leave requests as though they were any user under their administrative purview.
B. Solution
To follow along with this guide, please navigate to Tools > Leave Requests.
Step 1: Click Add
To begin adding a Leave Request for another user, click the green Add button located in the top left corner of the Leave Manager OR right click an existing leave line and select Add from the context menu. If you do not have access to the "Leave for Other Users" feature, you will go directly to the Add Leave popup; however, if you do have access, you will instead see a small dialog box that asks you to select the user who is getting a Leave Request.
Video: The Create Leave Request "Select User" Dialog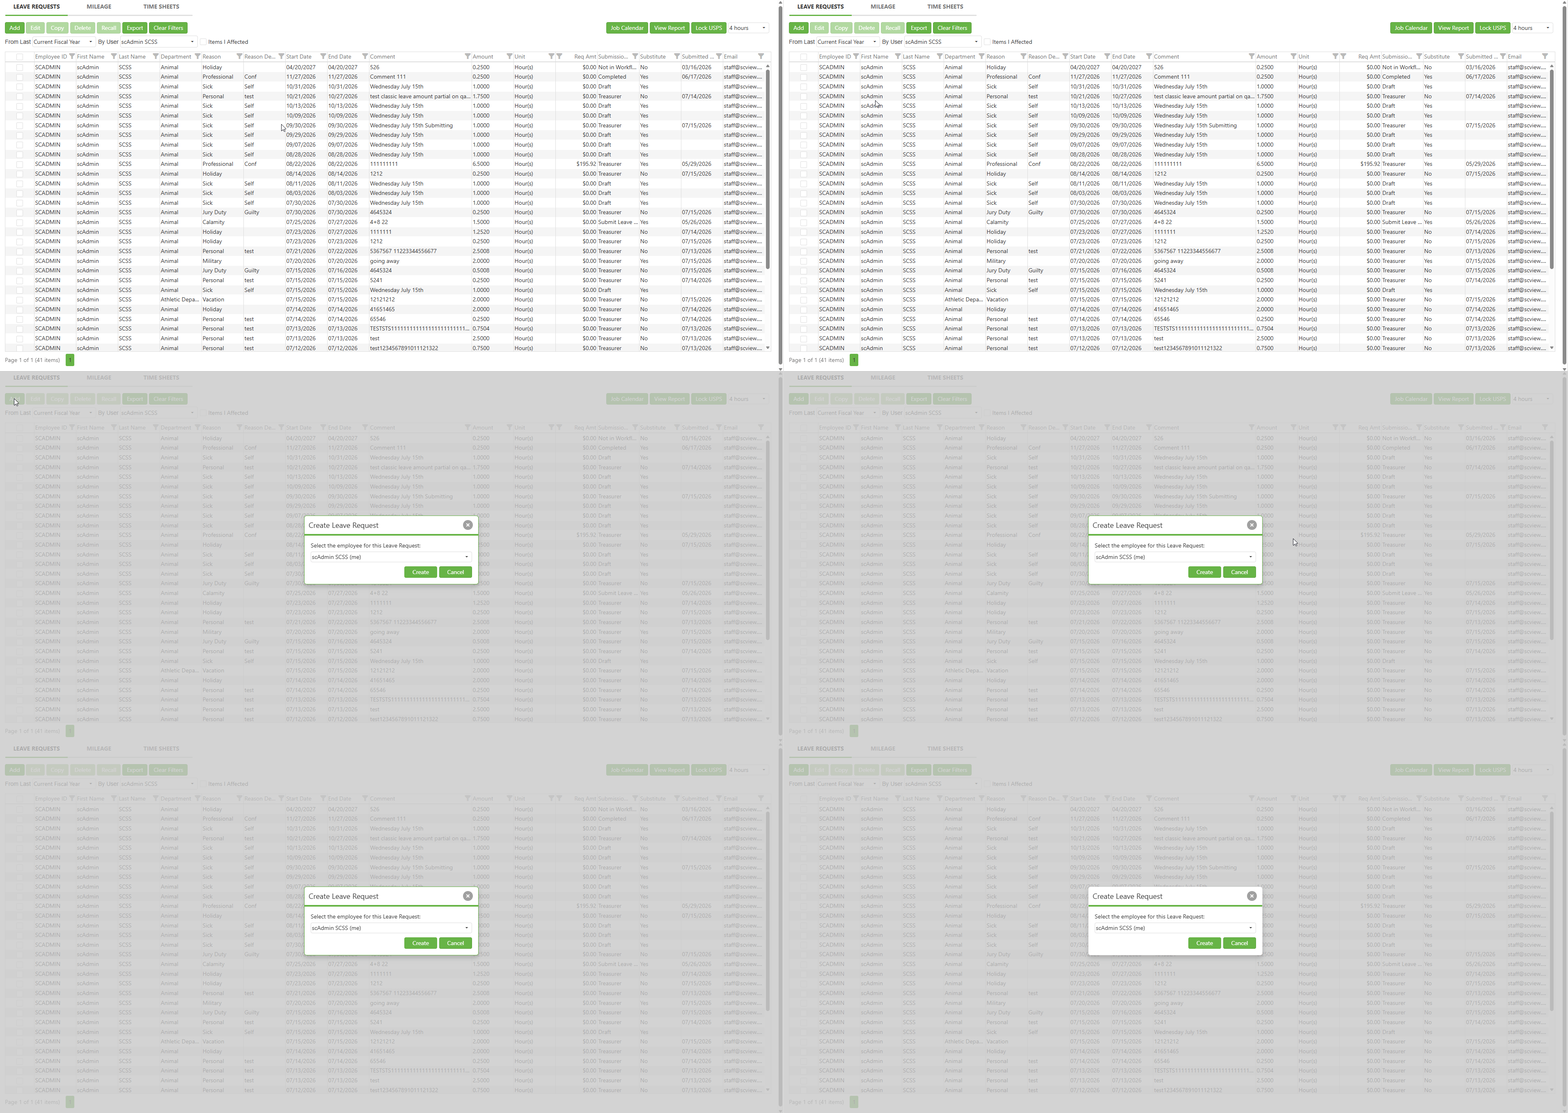
Note: Adding Leave for another user requires that you have Report View access to one or more departments to which that user belongs. Unrestricted does not have access to this feature.

Additionally, if an employee does not have an assigned Employee ID in the Payroll section of Admin > Users, that employee cannot have Leave Requests added for them.

Finally, you must have User Payroll setting "Leave Input for Others" enabled.
Step 2: Select User
Now that the Create Leave Request dialog is visible, select the user for whom you wish to make a new Leave Request. This can be done in two ways.
- Click the dropdown tab to the right and select a user from the list presented. This approach is efficient for people with few Report View privileges.
- Click the body of the combobox field that currently contains your own name, delete it, and begin to write the name of the desired user. A filtered dropdown containing individuals who match the input search query will appear. This approach is efficient for everyone.
Once a user is selected, click the Create button.
Video: Selection Options for Create Leave Request Dialog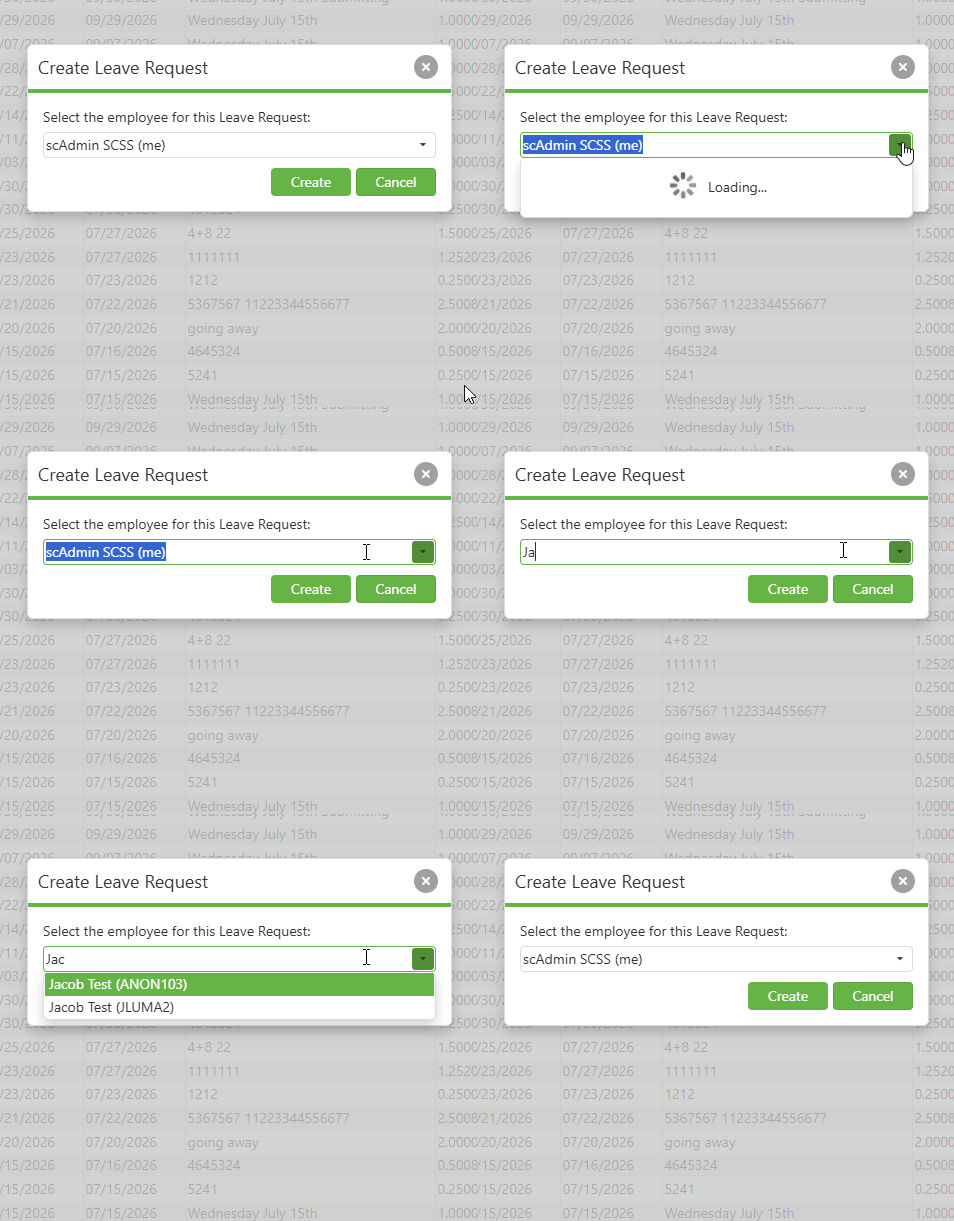
Sidebar: Hotkeys for Power Users

ENTER (as soon as the Create Leave Request dialog opens) - The dialog box closes and Add Leave Request for the current user opens immediately.

ENTER x2 (while focus is on the dropdown menu) - Confirm user selection and open Add Leave Request for the chosen user.

ENTER (while focus is on the dropdown menu) - Confirm user selection.

ESCAPE - Dismiss the Create Leave Request dialog.
Step 3: Fill out Leave
At this point, a normal Add Leave popup appears. The name of the user who owns the request is displayed in the header. Fill out the Leave request as normal. When it is submitted, the system will change the owner of the Leave Request to the selected user so that the individual can make edits to the request if the need arises.
Video: The Entire Selection Process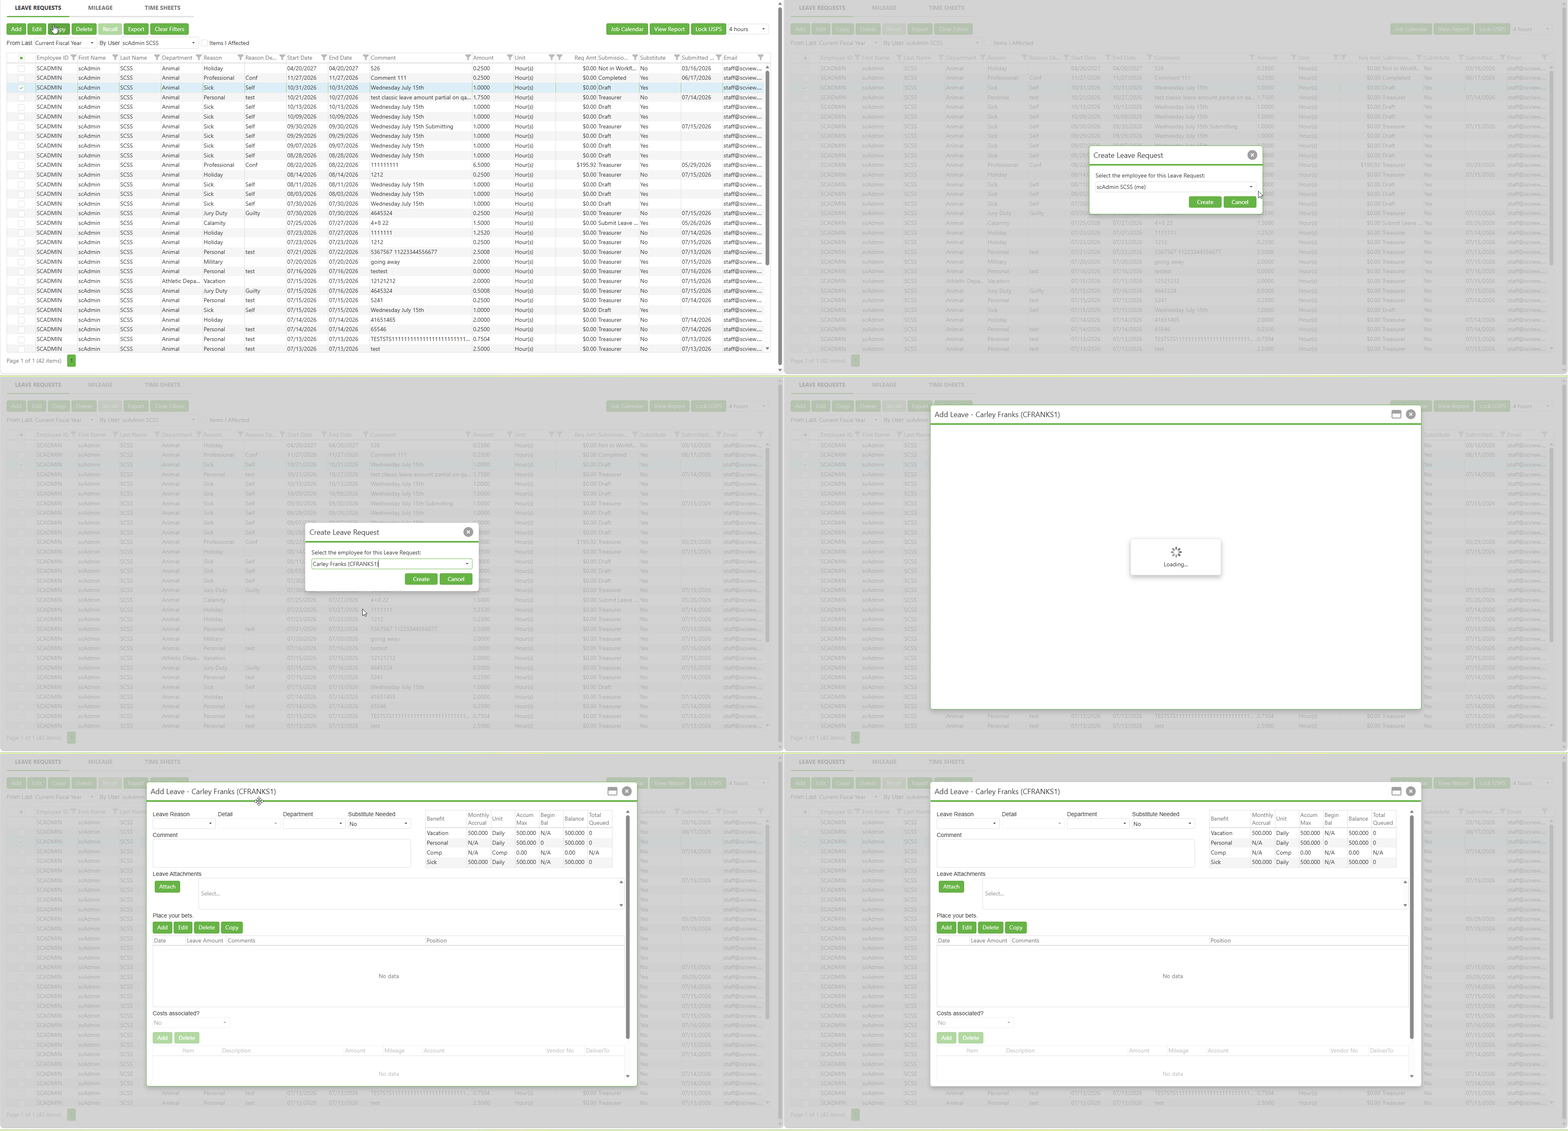
Step 4: Alternate Path: Copying
As an alternate route to Steps 1 through 3, above, a properly provisioned user can copy an existing Leave request to make a new Leave request for that user. To do so, right click an existing Leave request owned by the user to be copied, select the Copy option from the context menu, and submit the time sheet once it is in the desired state.
Video: The Copy Leave for Another User Process
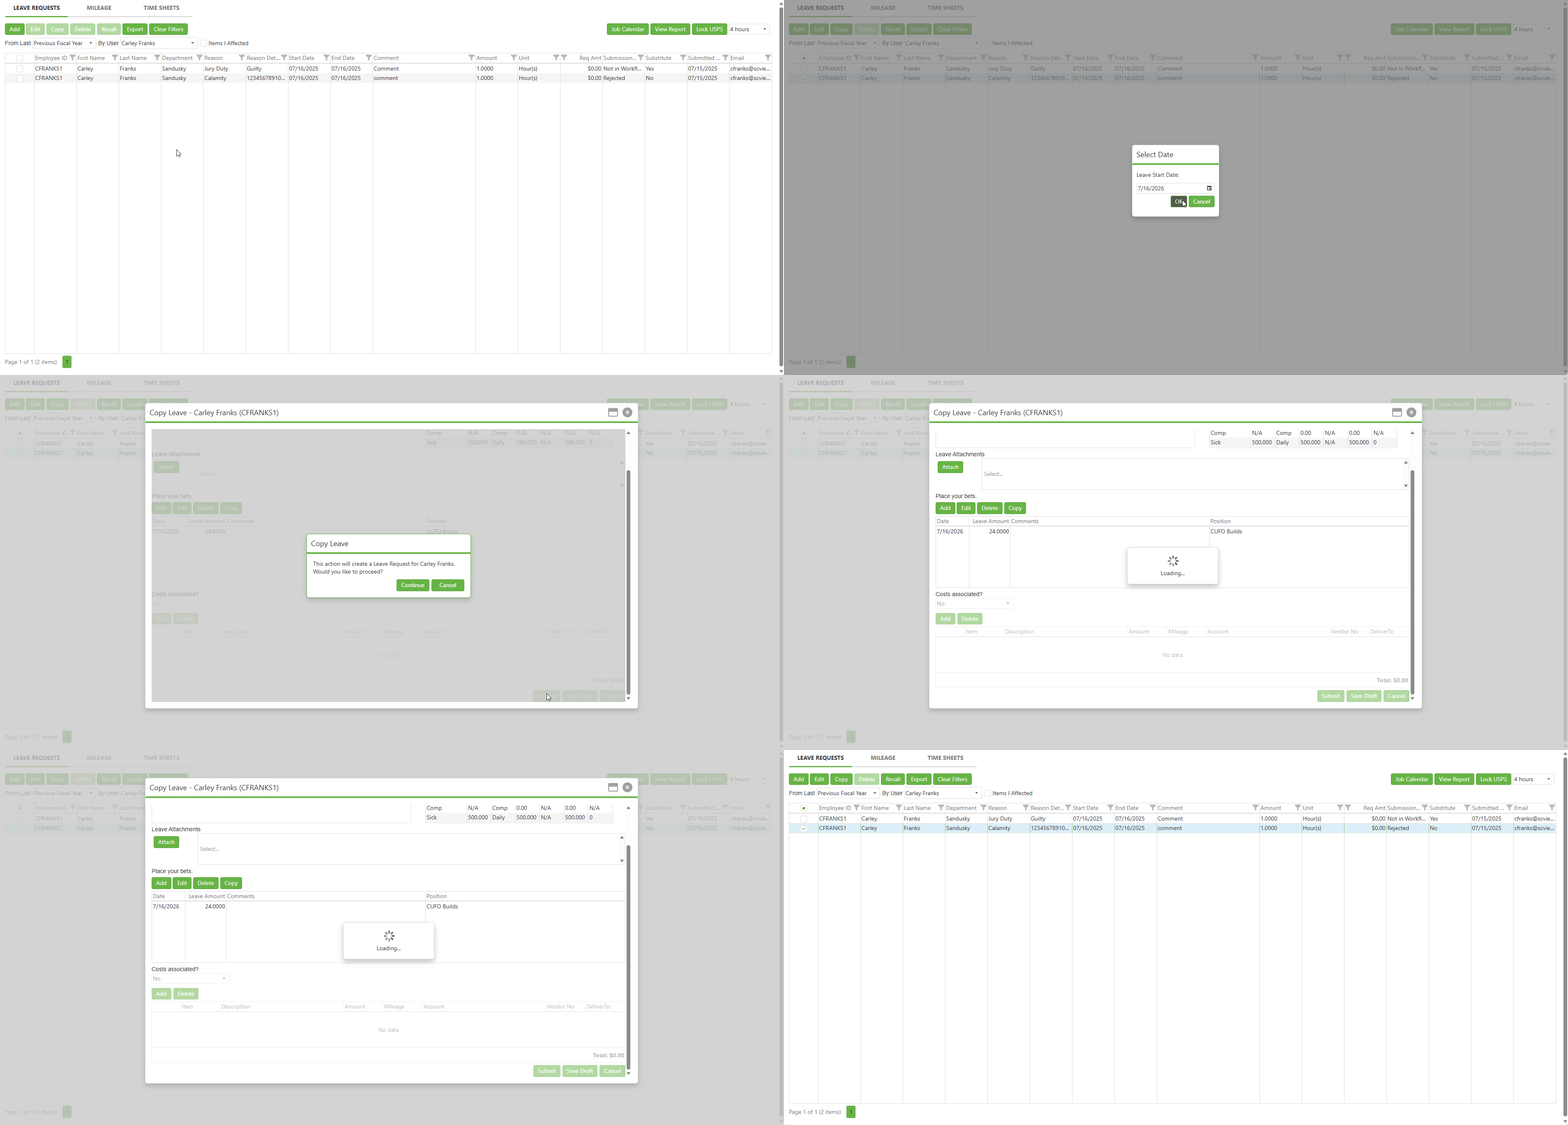
Note: The "Leave for Other Users" feature has permanently changed the behavior of Copying another user's Leave. Previously, Copying another user's Leave allowed a user to copy the Leave Line pattern for themselves. Now, however, copying another user's Leave will make another Leave for that user.

To accommodate this change in behavior, SCView now includes a submission reminder dialog that explains this change and asks for confirmation.
C. Best Practices
Properly Encapsulate Report Viewers - Leave For Others is a powerful feature. Please use its inclusion as a cue to doublecheck your organization's permissions scheme. Are all users who can use this feature individuals who should have access to this feature? Conversely, are there individuals who would benefit from being given it?
D. Troubleshooting
Unrestricted is not enough! - This feature is not given to Unrestricted users. For Unrestricted users with genuine need for this feature, give them appropriate Report View permissions.
Copy behavior changed - Copying another employee's Leave will now make a new leave for that employee. Previously, it copied the structure of the employee's lines to make a new Leave for the user.
Can't see a user? - A user will never appear in the "Leave for Another User" dropdown if he has no EmployeeID. If you expect a particular employee, check this factor first.
I can't delete a draft I made for somebody else! - The owner of a Leave request draft can always delete their own drafts. When creating a Leave request for somebody else, though, the owner of the document changes to the person for whom it was made as soon as it is saved as a draft. If you can't delete the draft, then you don't have the delete permission. Ask the owner of the draft to delete it for you!
E. Related Articles
Leave: How to Use the Leave Form
Conclusion
Susan doesn't have to log in and stare blearily at the screen for five minutes so that she can be allowed to be sick anymore. With Leave for Others, she can focus on recovery and be dead to the world until whatever ails her has gone away while her superior, or an individual with Report View administrative powers, logs the Leave Request for her. The system handles the rest, reassigning ownership so Susan can make edits if her boss's best guest ends up missing the mark by a bit. As with any powerful feature, take a moment to review who in your organization has access to this tool and whether that access lines up with actual need. Once you've got your permissions squared away, go ahead and give the feature a try the next time someone can't make it in to submit their own request.