
 | ||
Introduction
This article explains how to read, interpret, and configure Blackout Date rules in SCView's Payroll Site Settings. You will learn how these rules control employee leave requests by department, leave type, and date, and what conditions affect how limits are enforced.
A. Problem Statement
Organizations need a way to automatically restrict employee leave requests during critical operational periods without relying on manual oversight. Without proper controls, administrators are left manually tracking requests, risking both understaffing and unnecessary administrative burden.
B. Solution
To follow along with this guide, please navigate to Admin > Site Settings > Payroll.
Basic information for each column of the Blackout Date grid can be found in article Leave: Site Settings.
Step 1: Reading Blackout Date Rule Lines
Once on the Payroll Site Settings admin page, look for the Blackout Date section, located in the bottom right corner of the screen.
Image: Blackout Dates Grid
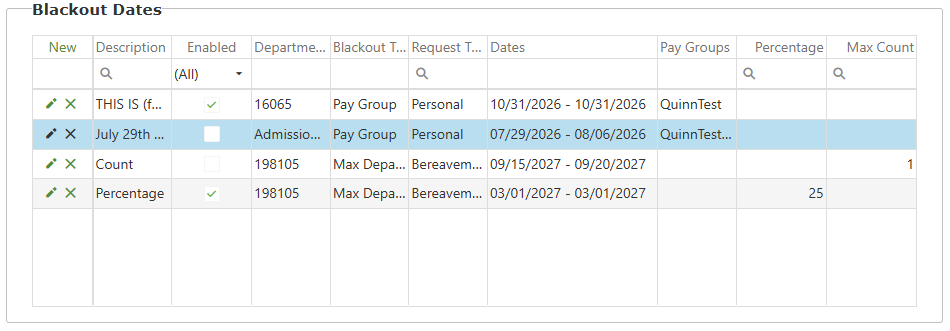
The Blackout Dates grid displays extremely granular rules that dictate which employees are limited in their ability to submit Leave requests in SCView. Each line can be interpreted as a mix of "Who?" and "How much?"
WHO - The Department, Request Type, and Dates columns, when taken as a group, dictate who is affected by the rule. Employees in the listed Department who wish to submit the listed Request Type on the listed Date(s) are subject to the HOW MUCH constraints.
HOW MUCH - The Pay Groups, Percentage, and Max Count columns dictate how much leave can be taken by the people WHO are affected by the Blackout rule. These three columns are mutually exclusive, so only one of the three can hold a value at any one time. Let's break down what each column does.
- Percentage - The listed percentage is what proportion of the listed Department can take Leave of the chosen Type at once on the listed Dates. It always rounds down. For example, a department of 10 people that allows 25% to take Leave at once will allow 2 people to take Leave, because that is 20%, but will not allow 3 people to take Leave, because that is 30%, and 30% is greater than 25%.
- Max Count - The listed number is how many members of the listed Department can take Leave of the chosen Type at once on the listed dates.
- Pay Groups - Pay Groups is actually an extension of the WHO, and the HOW MUCH is always 0. In other words, if Pay Groups are listed, then all employees in the listed Department on the listed Dates for the listed Request Type who have a position with the listed Pay Group cannot take Leave at all. It is a complete shut out.
Step 2: Rule That Affect Percentage and Max Count "How Much?"
Before we continue into how to make Blackout Date Rule Lines of your own with the rules discussed above, we need to go over a few extra rules that can affect Percentage and Max Count Blackout rules.
Rule 1 - To be Counted, a Leave Request has to be in a Calculated Queue or Fully Submitted to USPS.
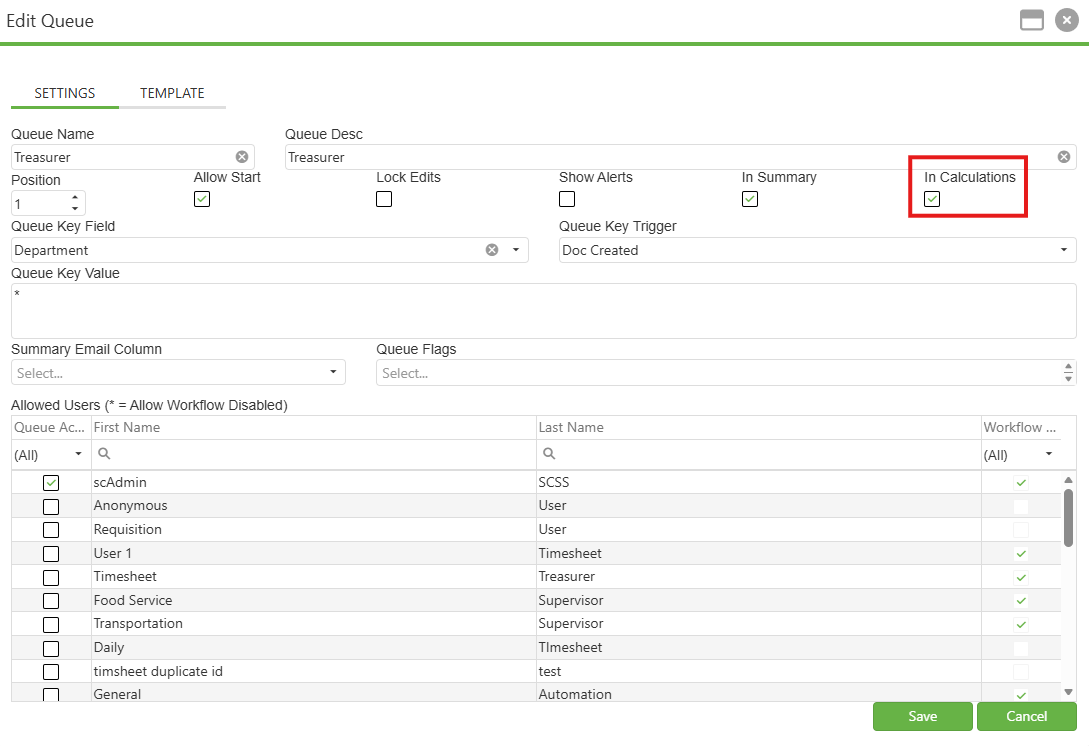
In Admin > Workflow, for each workflow queue, there is a checkbox labeled "In Calculations". If this is checked, then a rule-matching Leave request will count toward Percentage and Max Count limits on Blackout rules. If this is unchecked, then the Blackout rule is effectively defanged, as no request that is in that specific Workflow queue will count toward the limit. Employees in the department can make the equivalent of a million-dollar pileup in the Workflow and generate extra work for administrators who then become obligated to peel everything apart.
Once submitted directly to USPS, a rule-matching Leave request will count toward Percentage and Max Count limits on Blackout rules at all times, even if it gets recalled. This means that Workflow queues after final authorization, like the Completed queue or archive queues, do not need to be "In Calculations".
Conversely, if a Leave request that has NOT been submitted to USPS is recalled, it NEVER counts toward Percentage and Max Count limits because the only things that make it count are full submission to USPS or being in a Calculated Workflow queue. It's neither.
It is strongly recommended that all working Workflow queues before final approval have "In Calculations" checked if the Blackout Dates feature is to be used by your organization.
Image: Workflow Configuration in Calculations
Rule 2 - Percentage and Max Count Limits are number of people, not Number of Leave Requests.
Critically, the Percentage and Max Count limits applied in a Blackout Date rule are based on the number of people submitting Leave requests, not the raw number of Leave requests. This means that Joe can submit three separate Leave requests, each asking for a couple of hours off on a critical day, and they only count as 1, because Joe is one guy asking for Leave.
Rule 3 - Employees Who Submit Leave Requests Before the Limit are Unimpeded.
If an employee gets a Leave request in before the limit is met for a specific Blackout Date rule, then that employee is not stopped by that rule. Just like Joe did for Rule 2, he can add more Leave requests for that date without being stopped, edit existing Leave requests without encountering a validation error, and so on.
The employee must be careful, however, as he can edit his Leave, remove the Leave Line that gives him this power, and find himself locked out because he made a mistake.
Rule 4 - Old Leaves are Grandfathered.
When your organization enables a Blackout Dates rule, all Leave requests that are already in place get grandfathered in. Those employees will gain the powers listed in Rule 3 and can add/edit their requests unimpeded by the new Blackout Date rule.
Rule 5 - Blackout Date Rule Ranges are Quantized.
When making a Blackout Dates rule that encompasses a range of dates, please be aware that the whole range is not treated as a single object. Instead, the range is broken down into individual days, and each individual day tracks a separate Percentage and Max Count limit.
As Pay Groups has an effective Max Count of 0, it outright ignores all of the above rules.
Step 3: Adding Blackout Rule Lines
Now that we have gone over all of the special considerations that affect Blackout Dates rule lines, we can make our own! To do so, click the New link located at the top of the command column in the Blackout Dates grid. This calls the Blackout Date Configuration popup.
Video: The Blackout Date Configuration Popup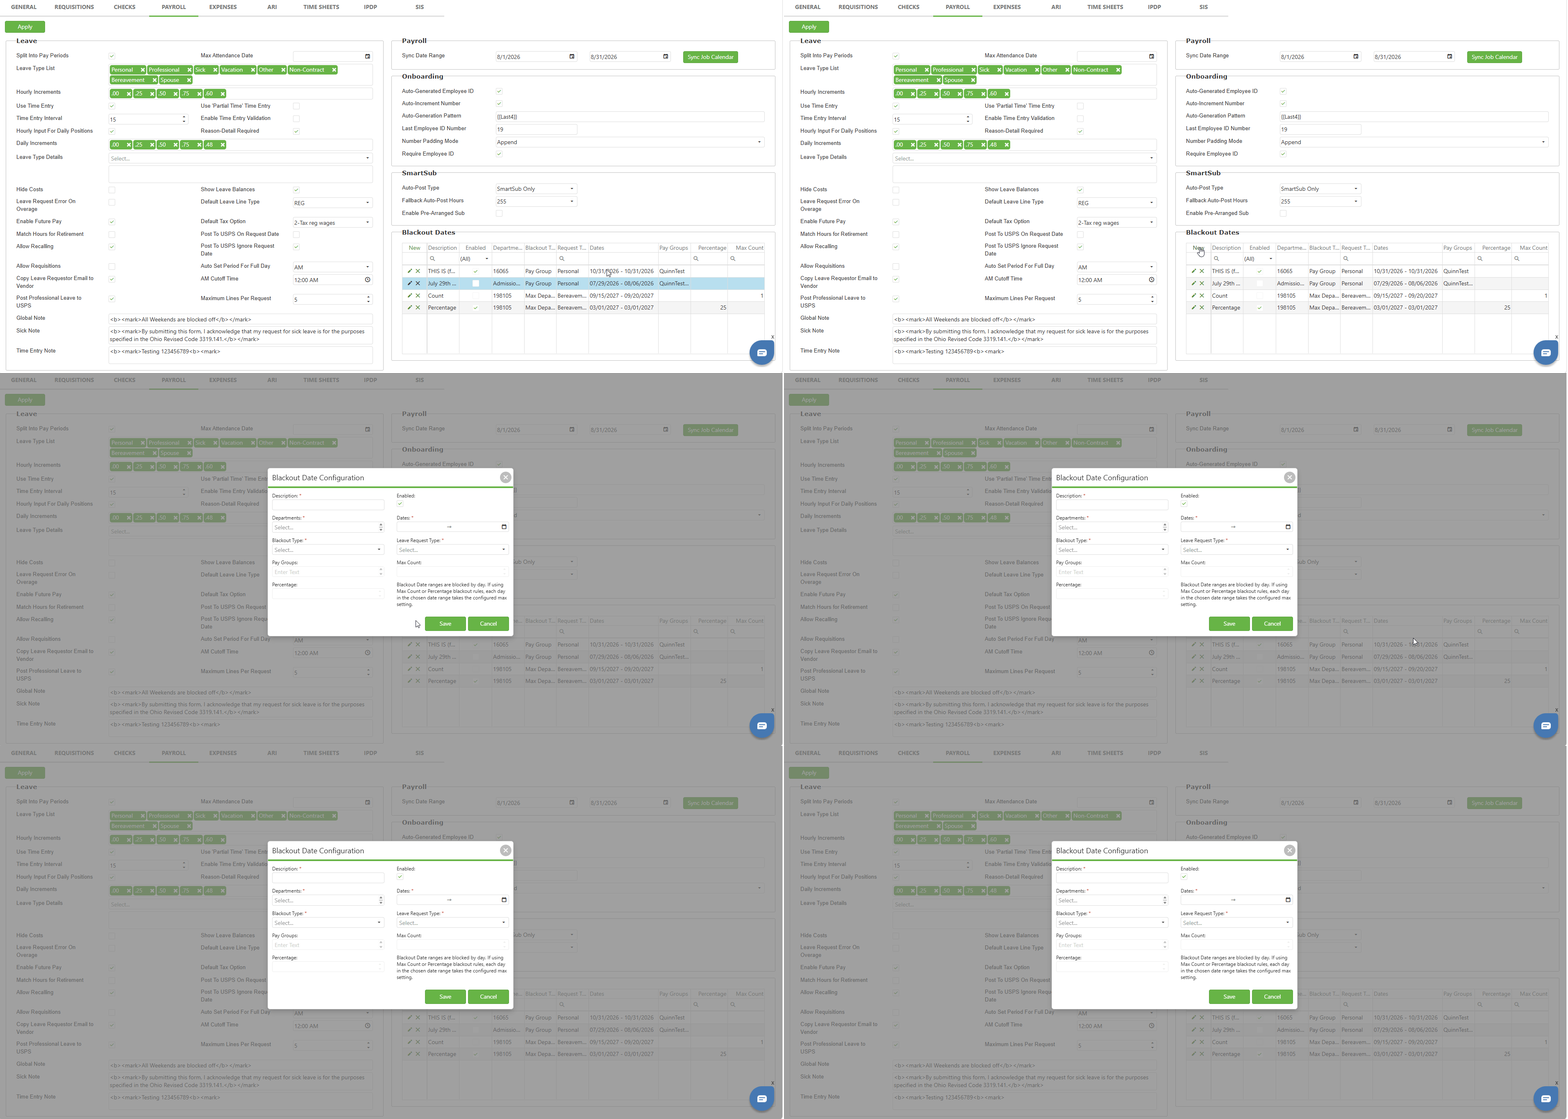
Fill out the fields in the Blackout Date Configuration popup based on these guidelines.
Description - This is a freeform field that acts as the "name" for the rule.
Departments - Using the same controls as the Departments and Report View fields in Admin > Users, selected Departments are affected by the Blackout Date rule and are presented as tagboxes.
Enabled - If checked, the rule is active.
Dates - The date, or dates, to be encompassed by the Blackout Date rule.
Leave Request Type - The Leave Type, or "Reason", affected by the Blackout Date rule.
Blackout Type - All remaining fields in this popup are mutually exclusive. The Blackout Type dropdown selects which of these fields will be enabled.
- Pay Group --> Enables the Pay Groups field.
- Max Department User Count --> Enables the Max Count field.
- Max Department User Percentage --> Enables the Percentage field.
Pay Groups - This freeform tagbox field allows the user to input any number of Pay Groups. They are semicolon delimited. If used, no employee who matches Leave Request Type, Departments, and Pay Groups will be able to take Leave on the listed Dates.
Max Count - This field accepts a positive, whole number. It designates the number of rule-matching employees who can request Leave before the Blackout Dates rule begins to block leave requests.
Percentage - This field accepts a value between 0 and 100 with up to two decimal places. It designates the percentage of employees that can take Leave from each rule-matching Department on the dates controlled by the rule.
Once the form is complete, click the Save button to add it to the Blackout Dates grid, then click the Apply button to make the changes permanent.
Image: The Apply Button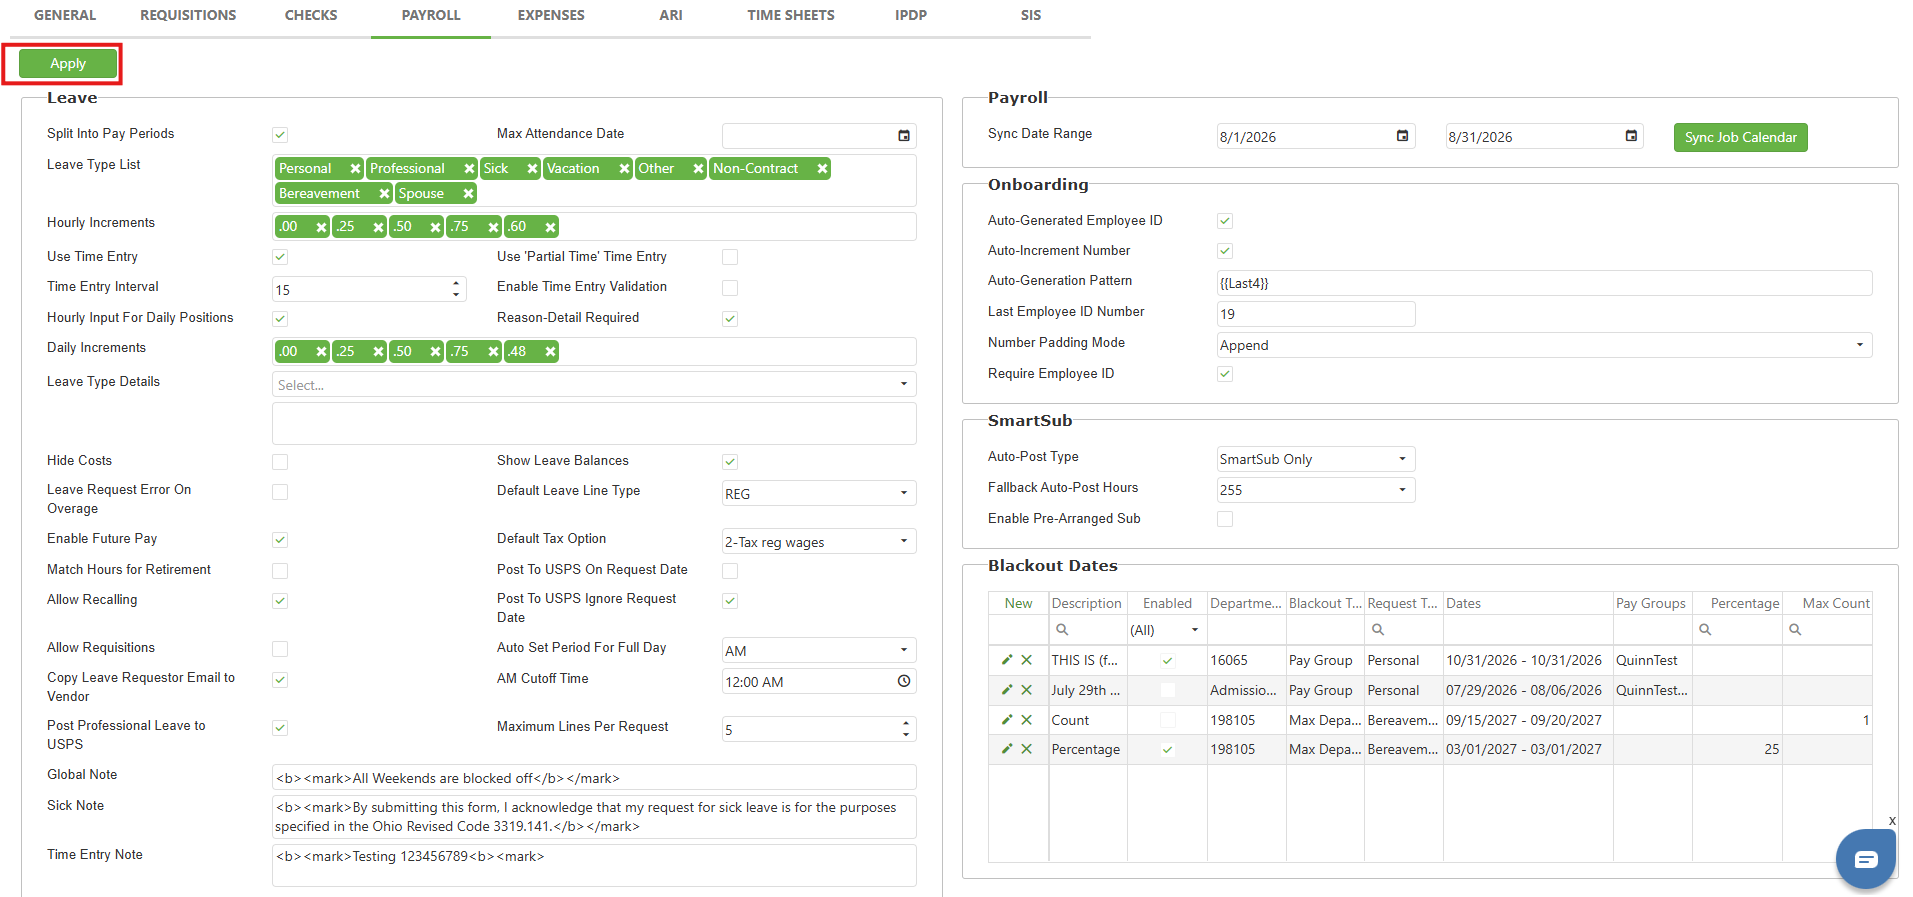
C. Best Practices
Use Percentage over Max Count - Department sizes vary or change over time, so Percentage scales automatically while Max Count remains fixed.
Use Pay Groups - Sometimes, a specific group of employees must be completely barred from taking leave on certain dates. Use Pay Groups rather than trying to engineer a 0% approach.
Activate rules before the dates in question - Existing requests are grandfathered in at the moment a rule is enabled. The earlier a rule is active, the more meaningful its limits will be.
Warn employees to review their leave requests carefully - An employee who submitted before the limit was reached can lose that protected status by removing the qualifying Leave line from their request.
D. Troubleshooting
Too Many Employees are Requesting Leave!
- Is this a particularly popular day and many requests existed before the rule was created? Remember, Leave requests are grandfathered in when a rule is activated.
- Is the rule Enabled? If the checkbox is not checked, then it will not enforce anything!
- Are all pre-approval Leave Workflow queues set to "In Calculations"? If not, no unapproved Leave requests in queue will count toward the limit.
E. Related Articles
Conclusion
Blackout Date rules give administrators precise, automated control over employee leave during critical periods.