
 | ||
Introduction
This update improves how users start scanning and submit new documents during the Online Indexing / Import Batch workflow. It introduces a modern, consistent scan experience and ensures that scanned (or dragged-and-dropped) pages can be uploaded to create a new batch.
A. Problem Statement
Online Indexing previously had to rely on documents that were already saved to their computer or network (for example, downloaded files, emailed attachments, or files exported from another system) and then import those files into a batch. This meant there was no direct way to capture paper documents at the point of indexing. Users who needed to scan had to scan externally first, save the files, locate them, and then return to Online Indexing to import—adding extra steps, slowing down the workflow, and increasing the chance of misplacing files or importing the wrong version.
B. Solution
Scan provides the convenience of scanning documents directly within the Online Indexing / Import Batch workflow, so users can go from paper to batch creation in one streamlined process.
Step 1:
To enable scan from online indexing you will need to have Allow import enabled for your user. Please reach out to your admin to have this setting turned on if you do not see online indexing available.
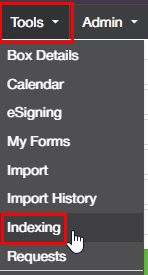
Navigate to Tools > Indexing.
Select Import on the batch selection screen. Another popup will appear and click the Scan button. You can enter a Batch name and description prior to clicking Scan and the name and description will carry over or you can enter it on the scan screen.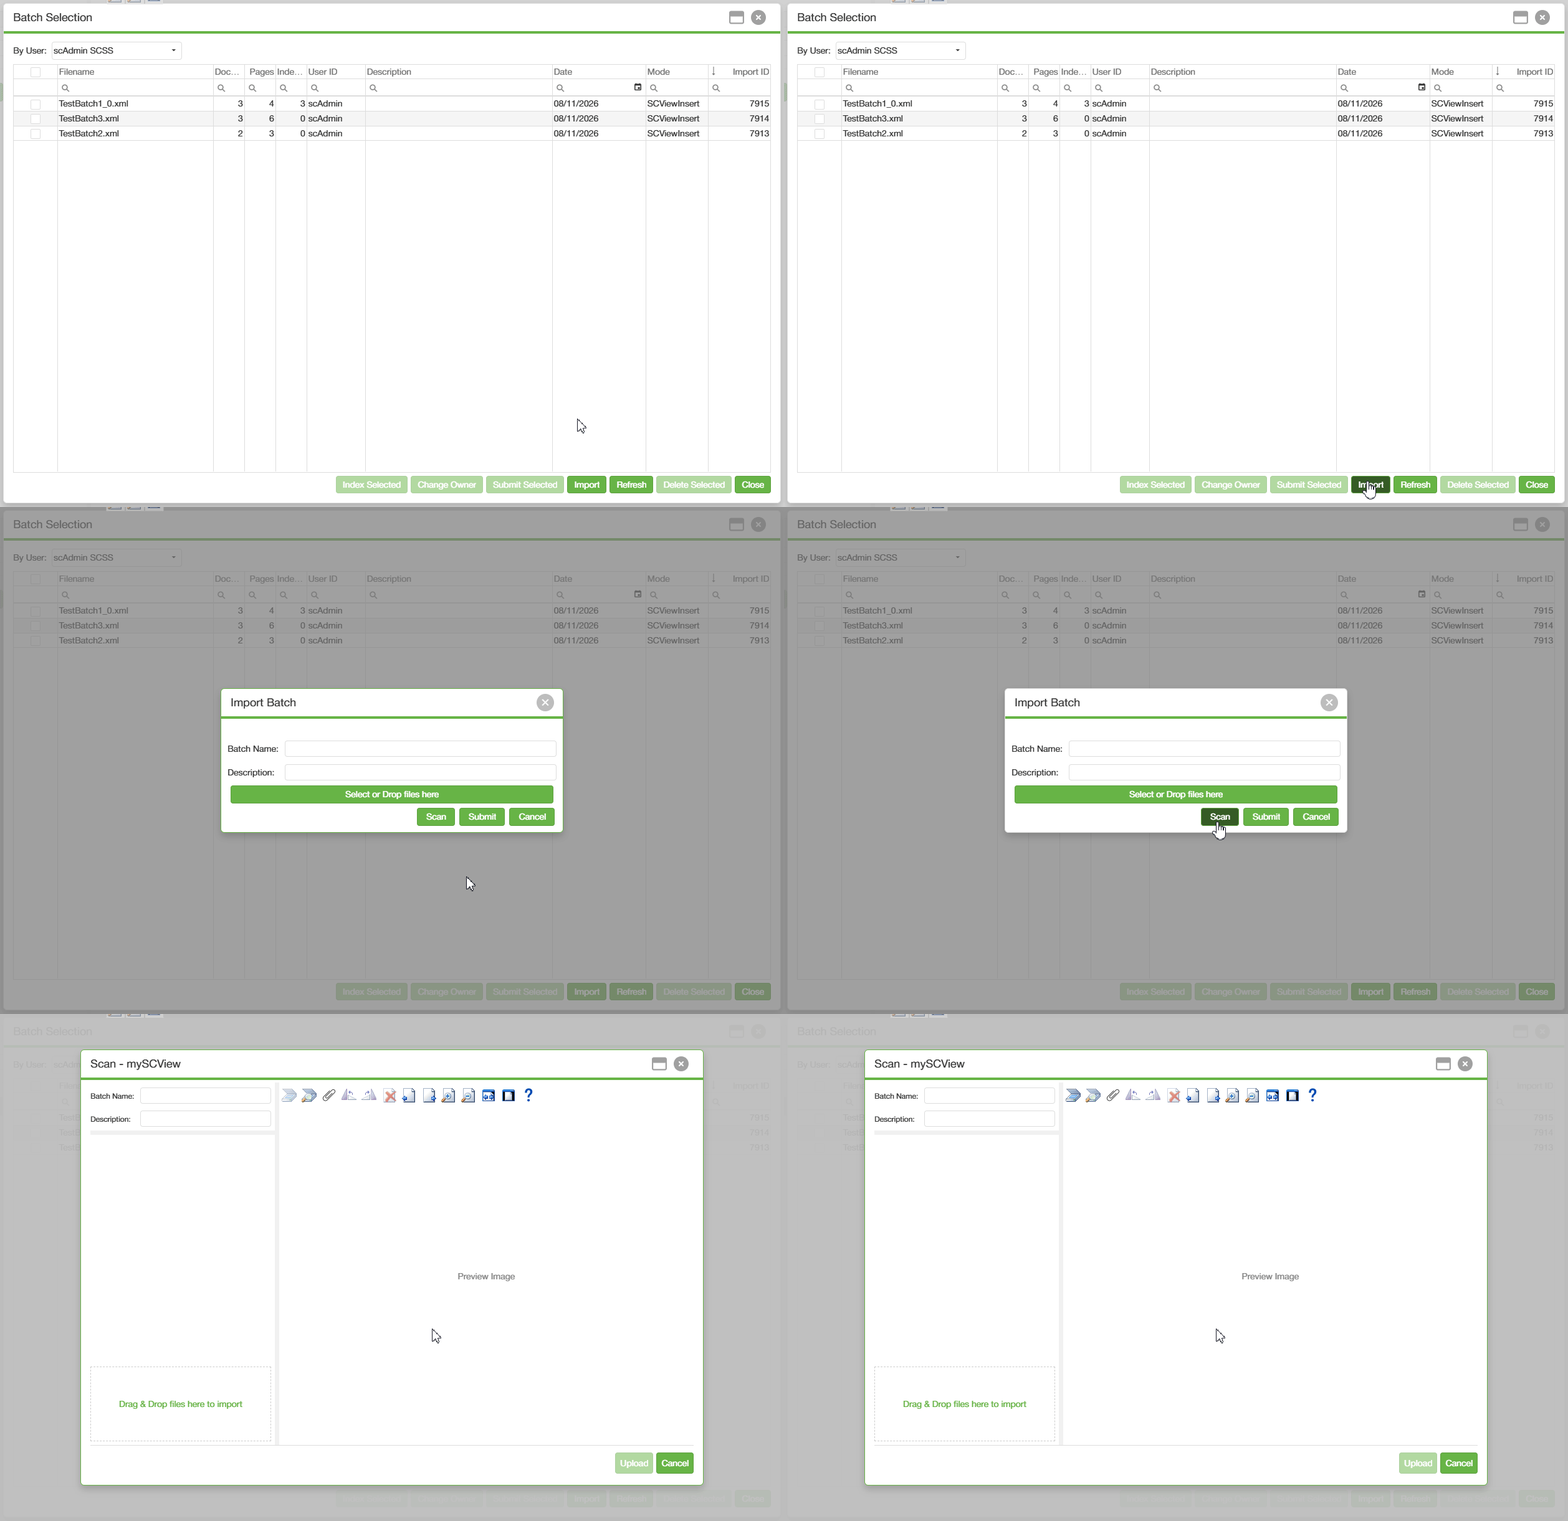
Step 2:
Once on the Scan screen you can begin adding files. You can also enter in your Batch Name and Description. The Batch name and description is not required. If no Batch name is entered the filename will automatically be assigned with _{Number} and the description will be blank. To start scanning documents click the "Scan" icon in the toolbar on the right side pane. If there is a scanner installed and plugged into your computer it will begin scanning in the documents. If no scanner is recognized a popup will display stating that "Failed to open scanner."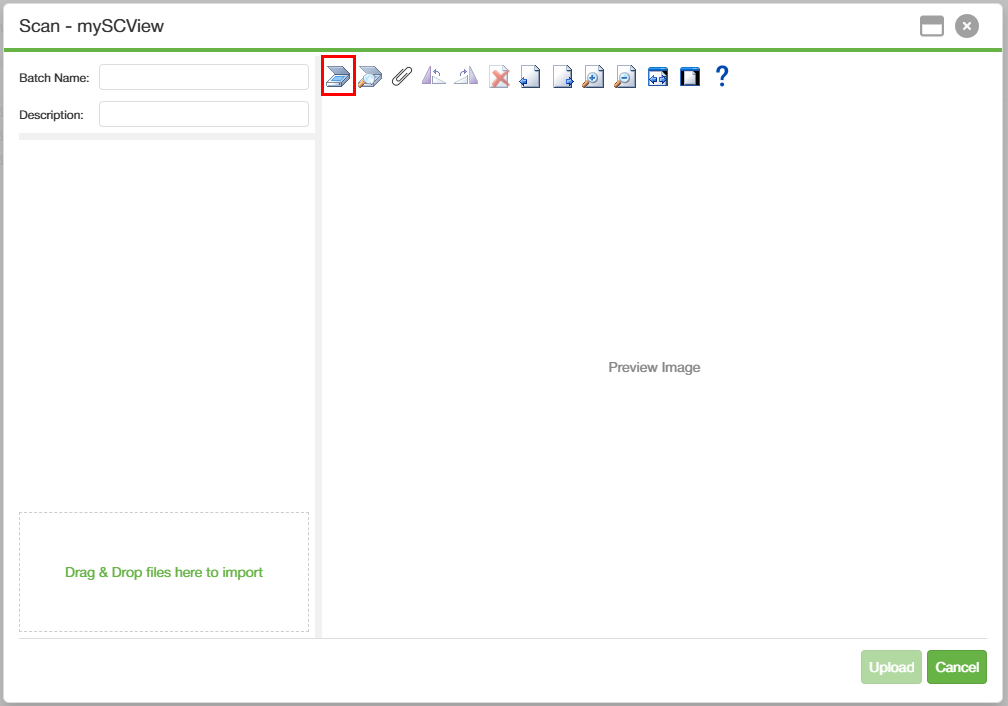
If you get the error that a scanner failed to open try clicking the Select scanner button next to the scan button. The dropdown will populate with any scanners connected to your computer or that have the installed software for it. If you do not see a scanner please make sure the drivers for that scanner are downloaded and the scanner is plugged in. Please reach out to support or your admin if the issue persists.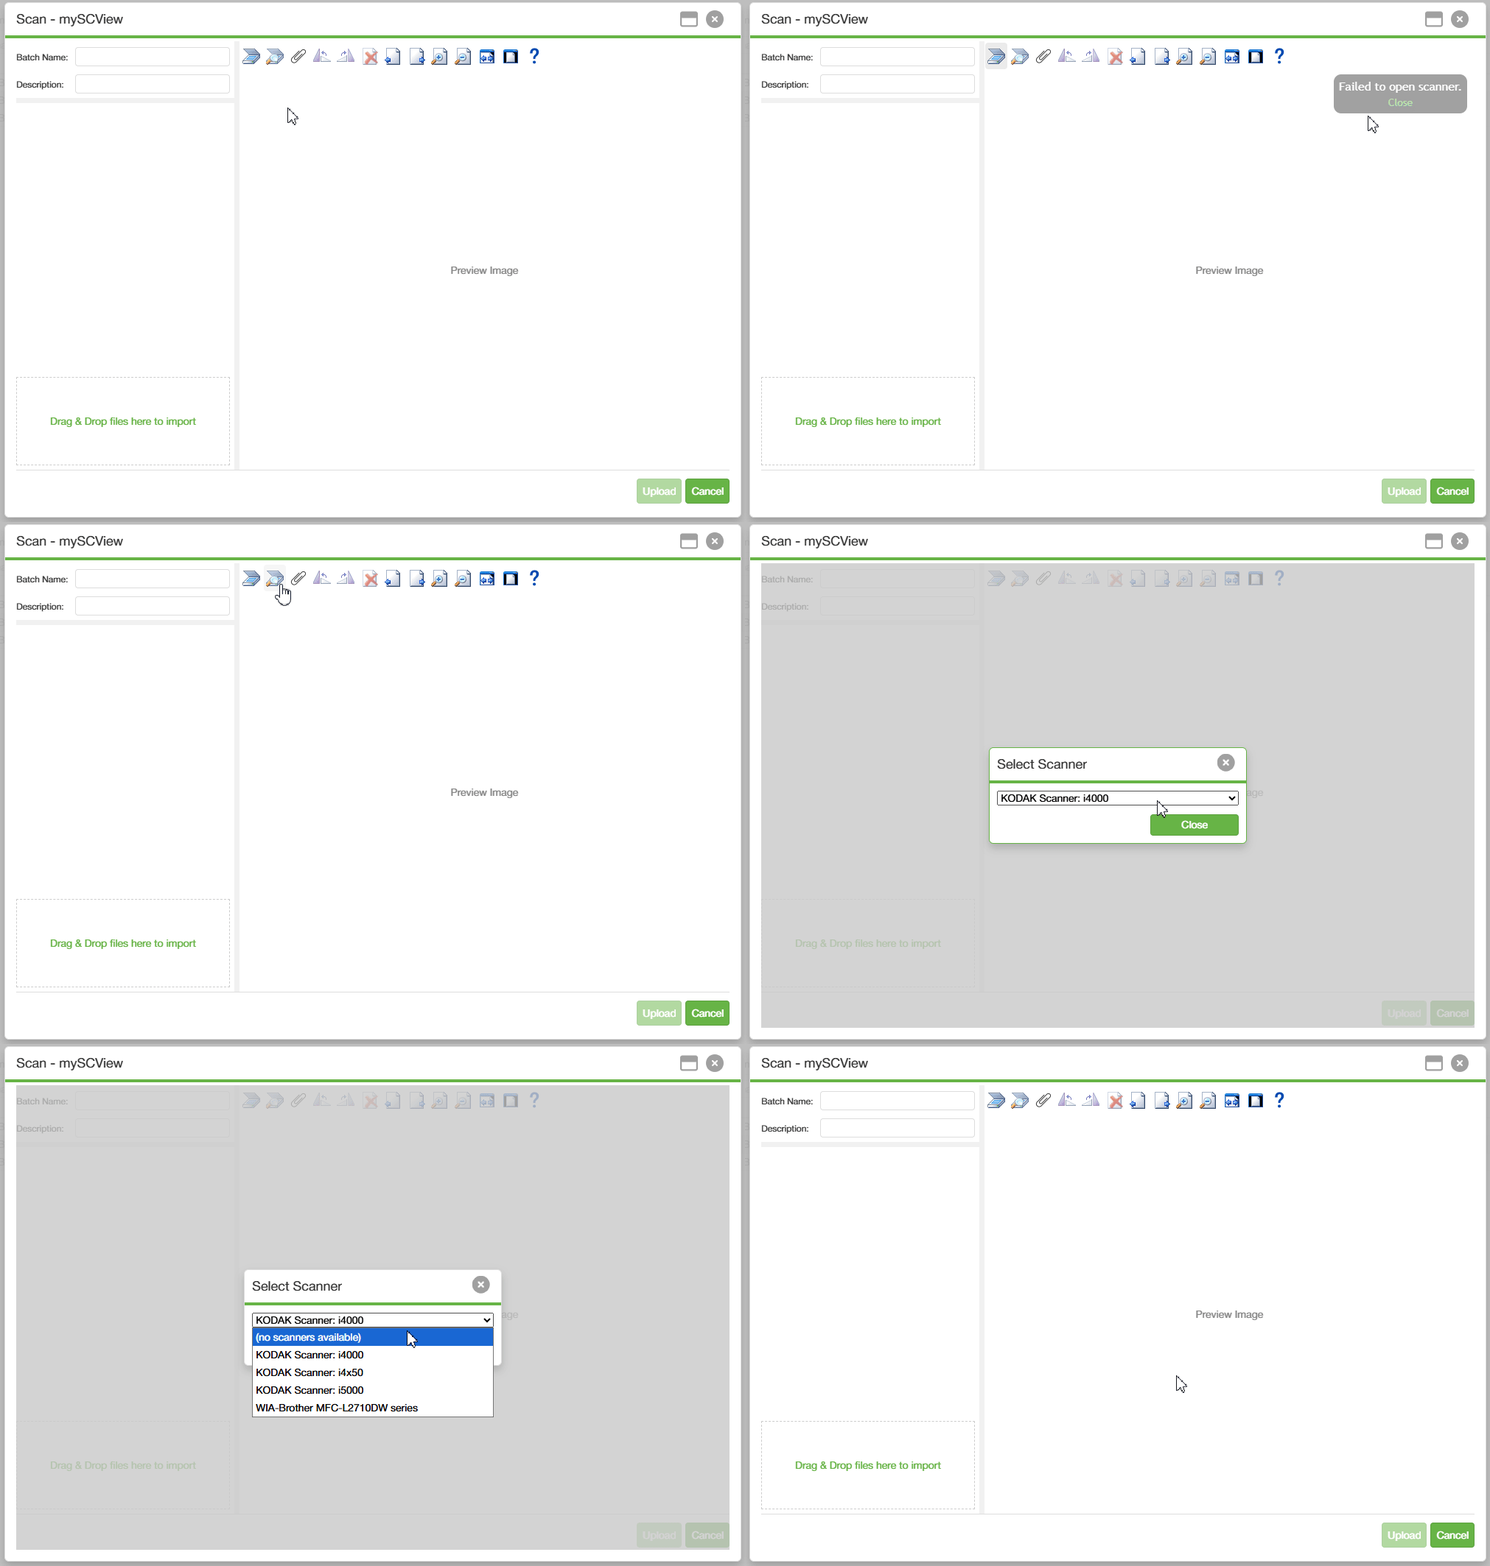
Files can also be Drag and dropped if they are already saved in your file explorer or desktop. You can also click the "Paperclip" icon so you can upload through the File Explorer.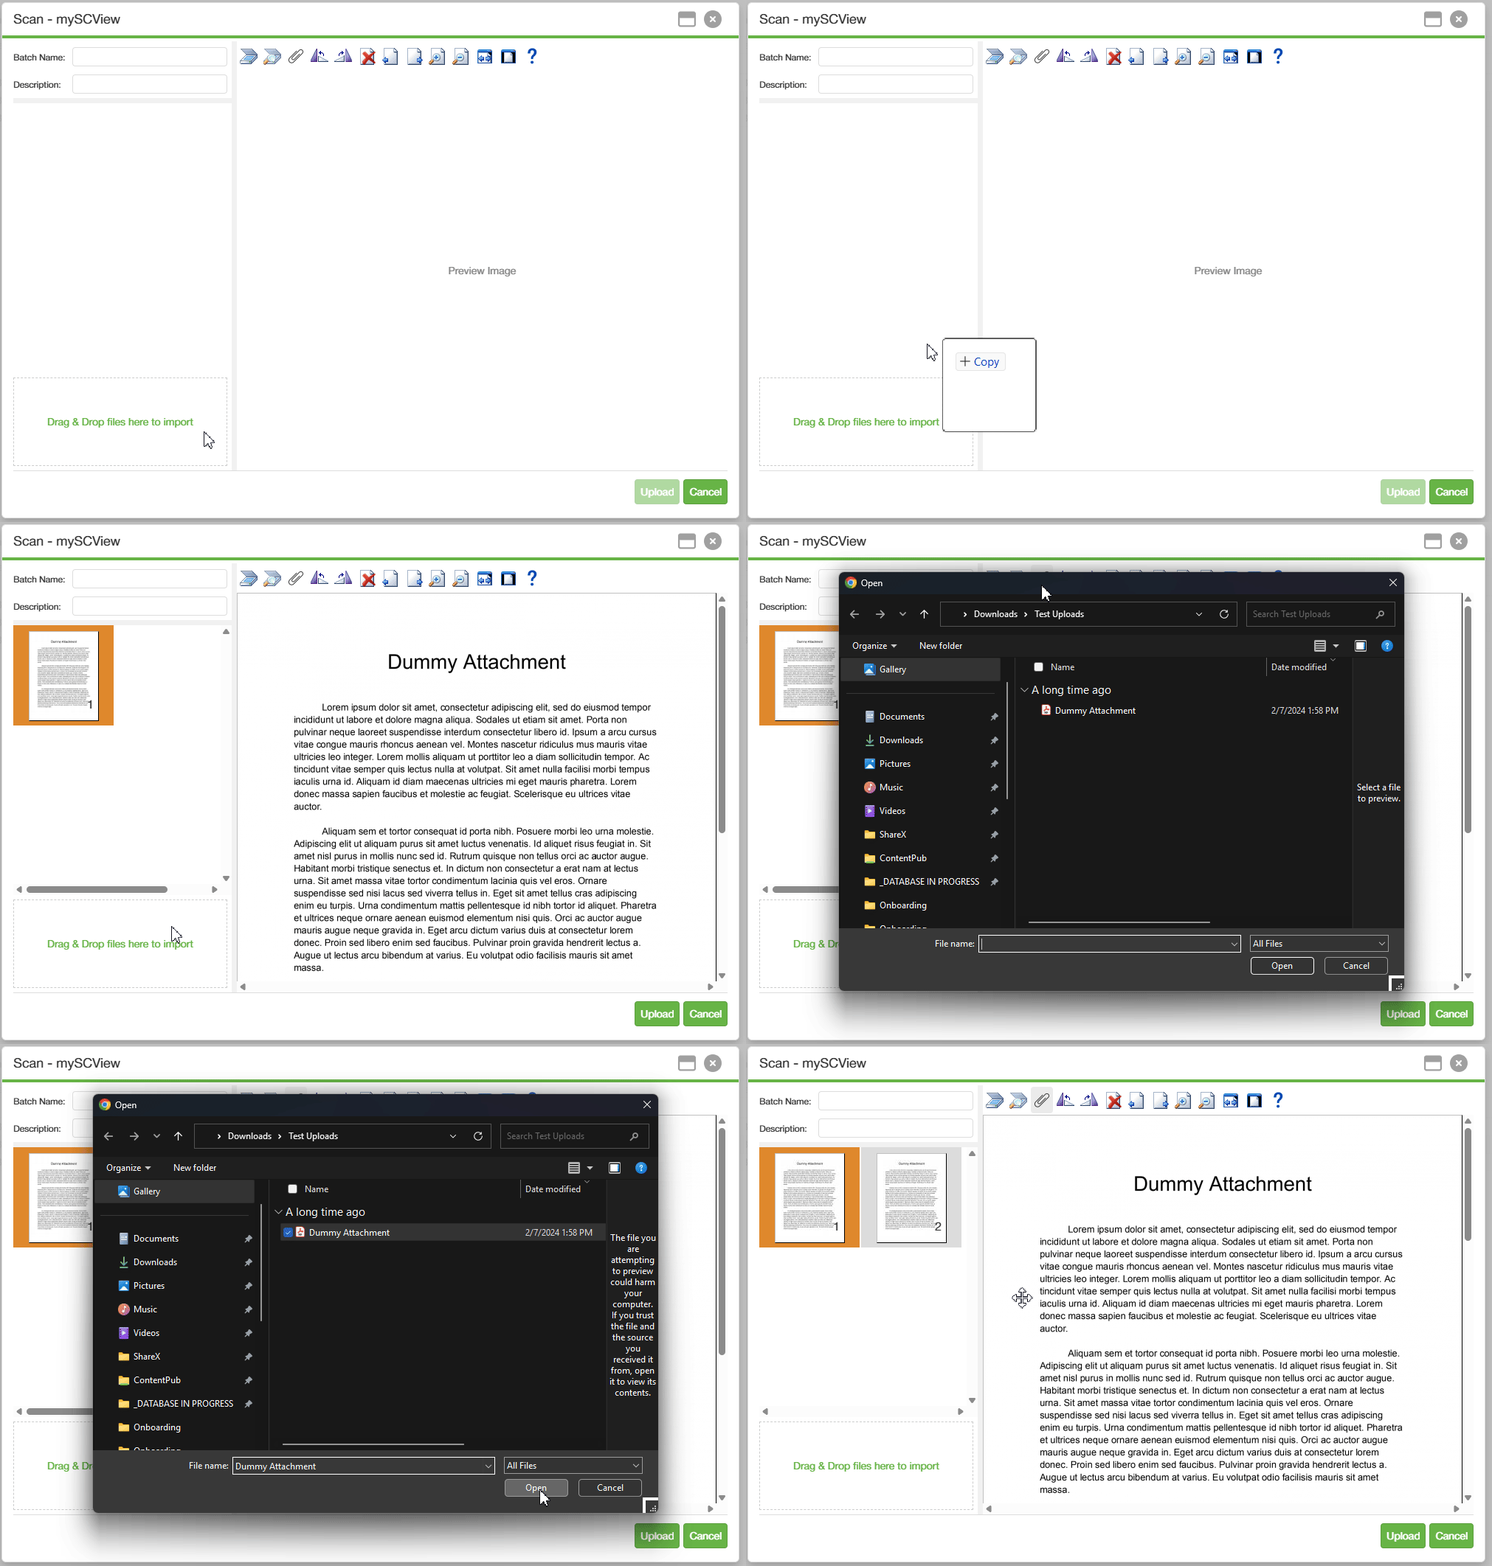 Files after being uploaded can be rotated. This can be accomplished by clicking the rotate icons in the menu bar or simply right click the image you wish to rotate and a context menu will appear and you can select to rotate left and or right. Deleting is performed the same way. Select the document you wish to delete, click the delete button in the menu bar or right click the image and choose delete.
Images can be reordered by grabbing the image and dragging and dropping it in the order that you wish.
After all images are uploaded you can click the "Upload" button in the bottom right. This will create the batch and after it successfully creates the batch the batch selection screen will refresh automatically displaying the batch, how many documents/pages etc. Now you can select your scanned batch and begin indexing as normal. Follow this guide to learn how to index documents.
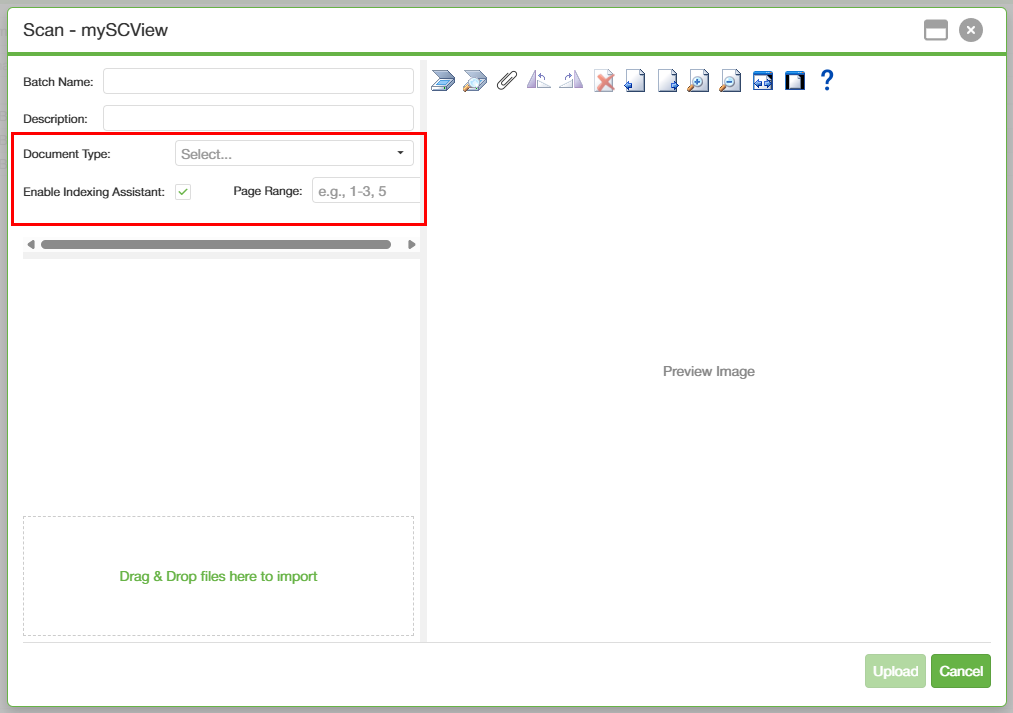
If you have AI Enabled this will follow the same in the scan window (see image below). Follow this guide for more AI online indexing.
With AI indexing enabled the scan feature will allow you to scan in documents and perform AI indexing on the pages you wish. If you do not want to run AI on this batch please make sure to uncheck the "Enable Indexing Assistant" option.
C. Best Practices
- Name batches clearly: Use consistent naming conventions so batches are easy to find and audit later.
- Prepare pages by removing staples, flattening folds, and arranging them in the correct order to reduce the chance of jams or skewed images.
- For multi-page batches, scan in smaller groups when possible and verify the pages were added in the expected position (beginning or end) before moving on.
D. Troubleshooting
- This usually means scanning is not enabled for your user/account configuration or the feature is not available in your current context.
- If you believe it should be available, contact your system administrator to confirm scanning permissions and feature availability.
E. Related Articles
Online Indexing: How to use AI Assistant with a batch
Conclusion
This enhancement makes scanning from Online Indexing / Import Batch more consistent and modern by routing users to the shared scan experience and completing the full “New Document → Upload → New Batch” workflow.