
 | ||
Introduction
This article provides a step-by-step guide for importing Pay Configuration rules into your Time Sheets system using a spreadsheet file. You will learn how to prepare your import file, navigate the import process, handle validation errors, and successfully apply your Pay Rounding Rules.
A. Problem Statement
Administrators need to efficiently import and manage Pay Rounding Rules for multiple employees and positions in bulk, rather than manually entering each configuration individually. Without a structured import process, maintaining consistent pay configurations across large organizations becomes time-consuming and error-prone.
B. Solution
To follow along with this guide, please navigate to Admin > Site Settings > Time Sheets.
Step 1: Click the Import Button
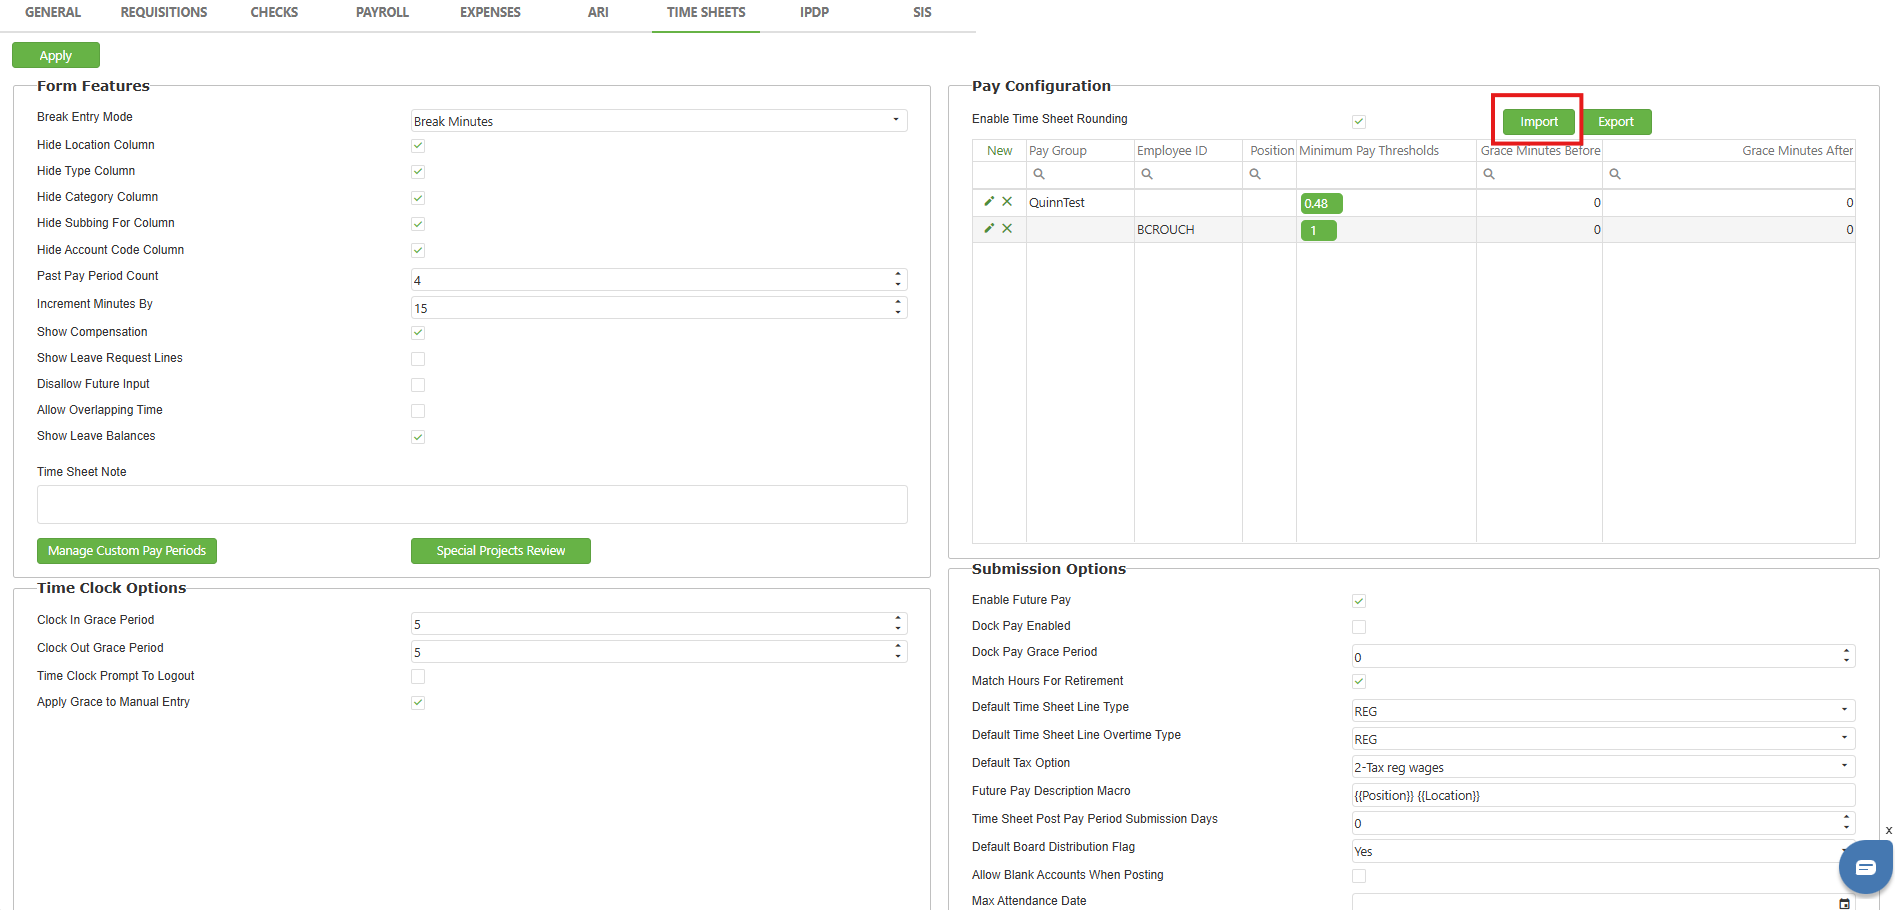
From the Time Sheets Site Settings page, click the Import button found in the Pay Configuration section. This will bring up the Import Pay Rounding Rules popup.
Image: Time Sheet Site Settings: Pay Configuration Import
Step 2: Select File to Import
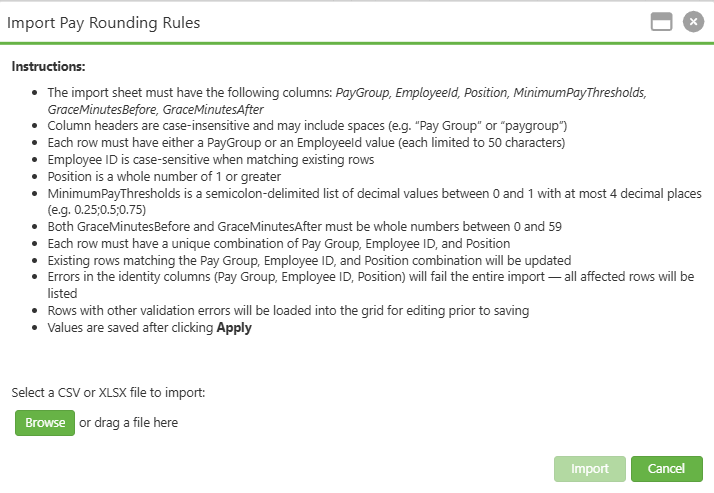
The Import Pay Rounding Rules popup describes a number of rules that are imposed upon the imported file. Those pertinent to the import process are reproduced, below, in Section: Appendix: Creating a Pay Configuration Import File from Scratch. If you do not have a file ready for import, use this appendix as a guide to help assemble your spreadsheet for import.
Once you have a .CSV or .XLSX spreadsheet file ready for import, click the Browse button and select the file for import.
Image: Import Pay Rounding Rules Browse Button
Step 3: Importing and Validation Errors
After selecting a file to import, the "Import" button enables. Click it to proceed with the import process. First, a process will look over the file and validate its contents. When the process complete, a popup will appear reporting the findings.
Image: Import Complete without Errors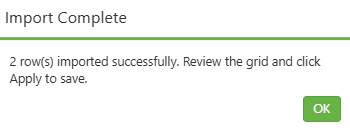
Image: Import Complete with non-Identity Errors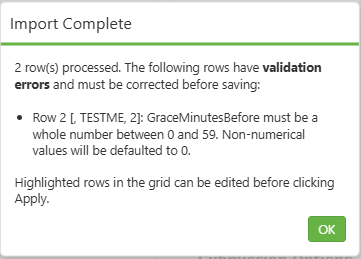
If there are duplicate rows or validation errors to "Identity" columns (see Part 4 of the Appendix for more information on Identity columns), the import will fail entirely. If there are validation errors found in other columns, the import will proceed, report which rows in the spreadsheet had that error, and the erroneous rows will be highlighted red in the Pay Configuration grid.
Note: If an existing row in the Pay Configuration grid matches the Pay Group, Employee ID, and Position of a row in the import file, then the import process will overwrite the Minimum Pay Thresholds, Grace Minutes Before, and Grace Minutes After columns for that row.

If there is no match, the import will create a new row.

For example, if we have an exact match of Pay Group: "Custodians", Employee ID: <blank>, and Position "1" between the Pay Configuration grid and the import file, then the other columns in the Pay Configuration grid will update with the information in the import file.
Image: Import Rejected due to Identity Errors
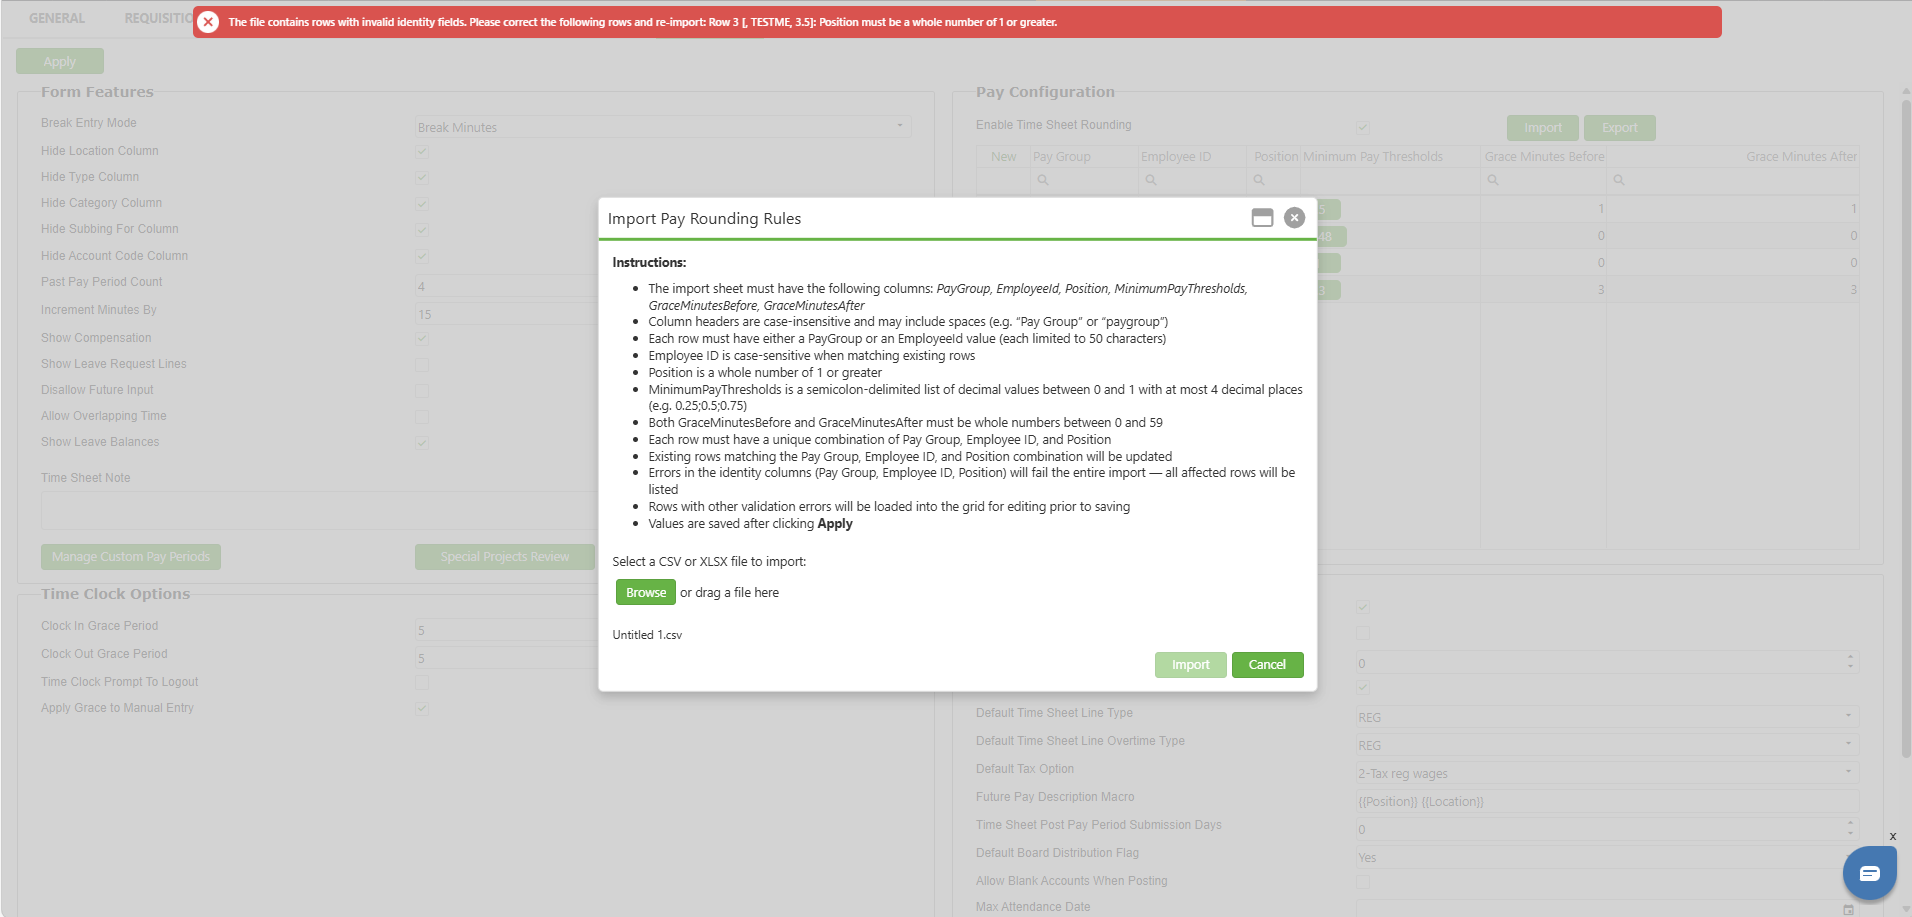
Image: Pay Configuration Grid with Errors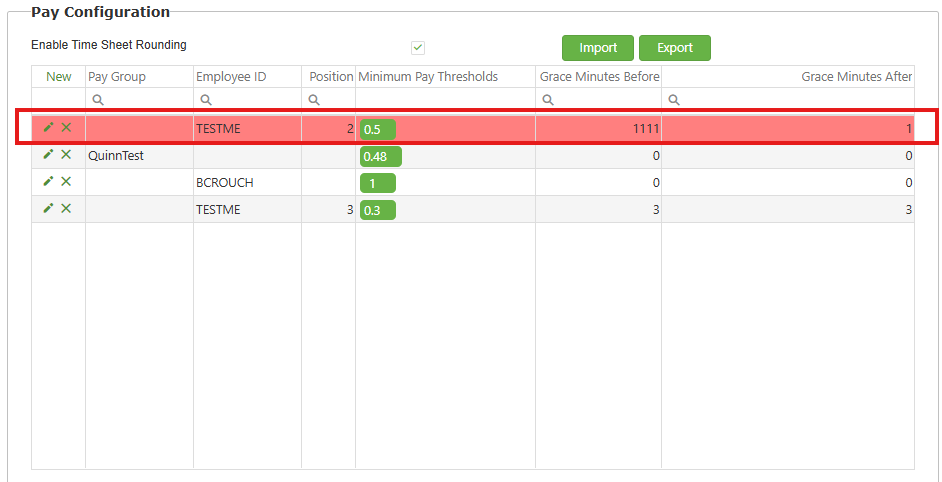
Step 4: Cleaning Up Validation Errors and Completing Import
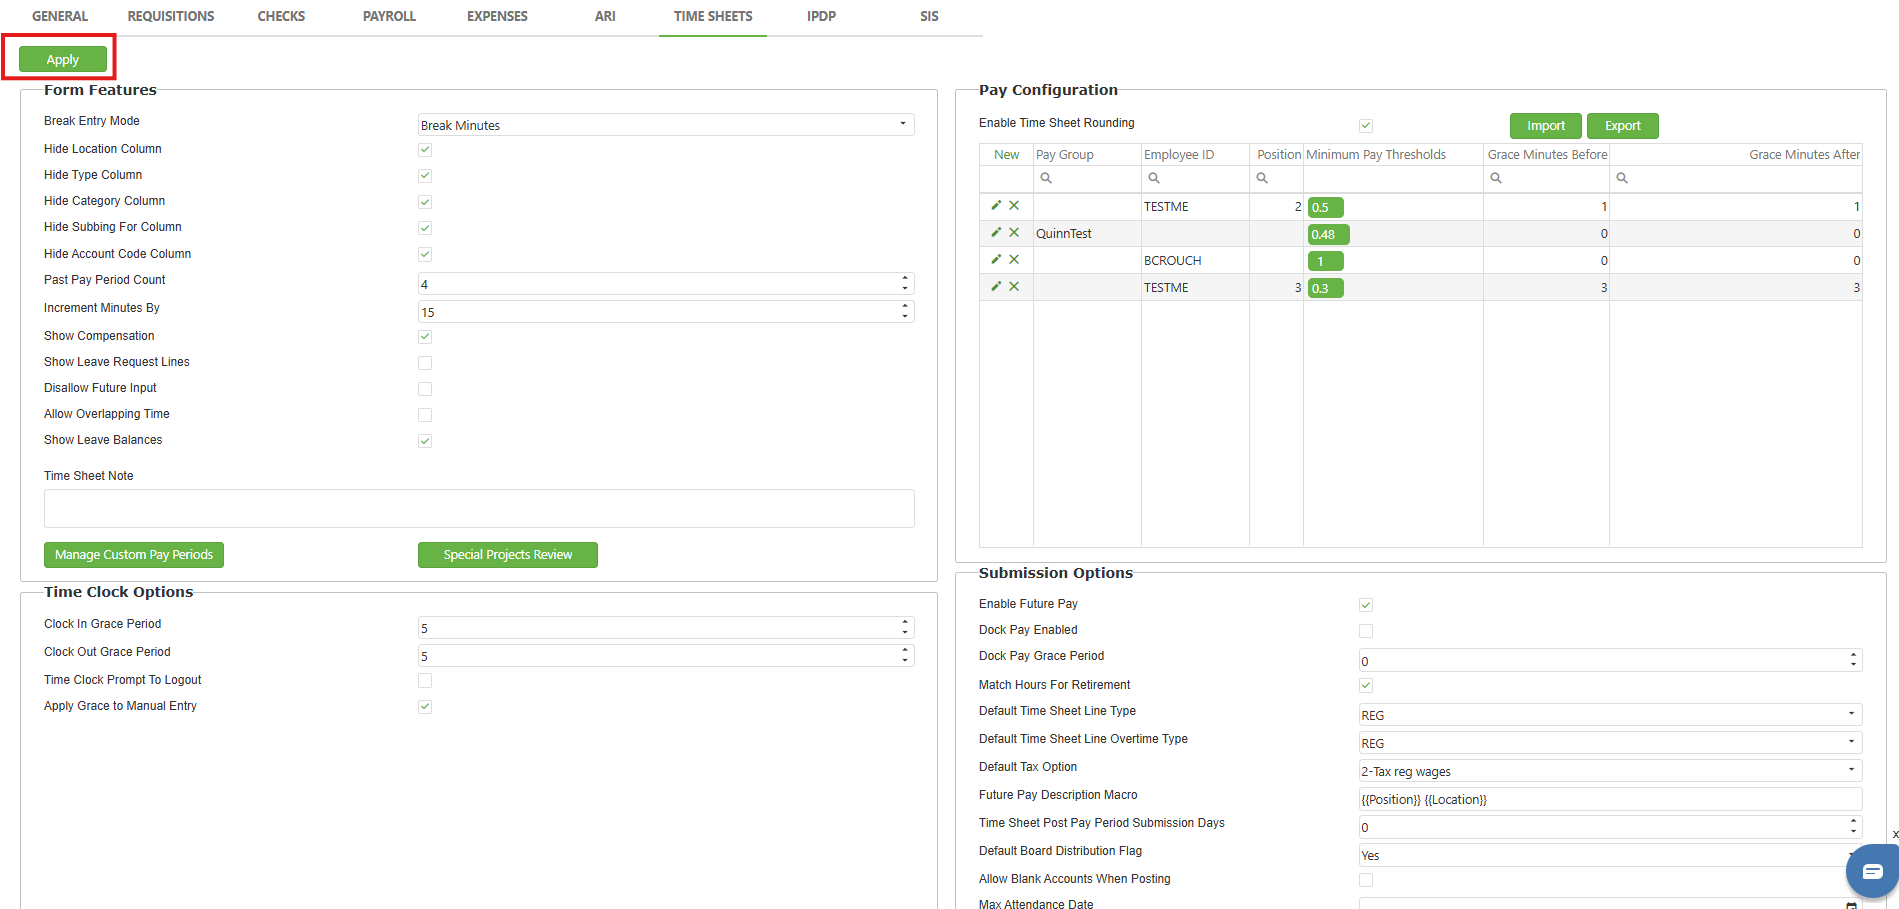
If there are no validation errors in your import, all you need to do to complete the process is click the Apply button located in the top-left portion of the screen. If there are validation errors, they will need to be corrected before the Pay Configuration grid can be saved.
Image: Apply Button
To correct validation errors, which are highlighted in red in the Pay Configuration grid, click the pencil (Edit) icon for that row, make the changes needed, and then click the floppy disk (Save) icon. If the
Appendix: Creating a Pay Configuration Import File from Scratch
To create a Pay Configuration import file from scratch, please follow these steps.
- Start with a blank .XLSX or .CSV spreadsheet file.
- On the first row of the spreadsheet, add the following headers, one per cell. Your headers are not case sensitive and may have spaces between the words. Pay Group, pay group, PayGroup, and paygroup are all acceptable variants.
- Pay Group
- Employee ID
- Position
- Minimum Pay Thresholds
- Grace Minutes Before
- Grace Minutes After
- Now that the headers are in place, input your rows of data below them. Each column has its own validation rules.
- Pay Group - Must be 50 characters or less
- Employee ID - Must be 50 characters or less
- Position - Must be a whole number of 1 or greater
- Minimum Pay Thresholds - Must be a sequence of numbers, delimited by semicolons. Each number must be a decimal between 0 and 1 with, at most, 4 decimal places. Put a space after each semicolon.
0.3; 0.4; 0.5 is an example of an acceptable set of Minimum Pay Threshold data. - Grace Minutes Before - Must be a whole number between 1 and 59.
- Grace Minutes After - Must be a whole number between 1 and 59.
- Once your data is populated, check the spreadsheet in its entirety for adherence to the rules below.
- We define Pay Group, Employee ID, and Position grouped together as "Identity". Each row in the spreadsheet must have a unique Identity. For example, if one row has a Pay Group of "Bus", an Employee ID of blank, and a Position of "1", then no other row in the spreadsheet is allowed to have this exact configuration. Violation of this rule will result in rejection of the import.
- Ensure that the individual "Identity" cells all pass their validation rules in Section 3 of this list, above. If even a single identity cell fails validation, import will be rejected. (We'll tell you which ones fail.)
- All rows must have either a Pay Group or an Employee ID. They may have both. If any row has neither, import will be rejected.
C. Best Practices
- Test with a small file first - Import a spreadsheet with 5-10 rows to validate your format before processing hundreds of records.
- Use Excel's data validation - Set up column constraints in your spreadsheet to catch errors before import (e.g., restrict Position to whole numbers ≥ 1).
- Standardize Pay Group names - Use consistent naming conventions to avoid duplicate configurations with slight variations.
- Review red-highlighted errors immediately - Address all validation errors before clicking Apply to prevent data loss.
D. Troubleshooting
- If import fails entirely, check the following potential issues:
- Doublecheck identity columns. A single mistake will halt imports!
- Check header spelling. If a single header column is misspelled or missing, import will fail entirely.
- If a header is duplicated, import will fail.
- If you processed your import, clicked Apply, and lost your changes, you likely left a validation error in the Pay Configuration grid. Make sure all of them are resolved!
E. Related Articles
Conclusion
Successfully importing Pay Configuration rules streamlines the management of pay rounding across your organization. By following the proper file format, validating your data against the identity and column rules, and addressing any errors flagged during import, you can efficiently update or create multiple pay configurations in one operation. Remember to resolve all validation errors before clicking Apply to ensure your changes are saved. With these steps mastered, you'll maintain accurate and consistent pay rounding rules across all employee groups and positions.