 | ||
Introduction
Importing files into SCScan plays a crucial role in managing documents efficiently, especially those received via email or downloaded from the internet. The import functionality in SCScan simplifies the preliminary steps of document management by streamlining how files are brought into the system for indexing. This guide provides a detailed overview of how to import documents properly into SCScan, ensuring that the documents are ready for further processing.
A. Problem Statement
The main challenge users face is understanding the import process and performing it correctly to ensure that documents are properly prepared for indexing in SCScan. This involves selecting the correct file types, managing the source location, and utilizing the available settings correctly to ensure that the files are imported as expected without errors or data loss.
B. Solution
The solution involves following a step-by-step process to import both individual files and entire folders into SCScan. It requires users to have the files saved on either their local computer or a network drive. The process includes selecting the appropriate file or folder, specifying the file type, and potentially setting the system to delete the imported files after the process to avoid redundancy and manage storage efficiently.
Importing files is helpful when a document was emailed to you or saved from a website. This process only changes how you get the documents into SCScan to index. The indexing process is still the same.
You must have the files already saved to your computer or a network drive to which you have access.
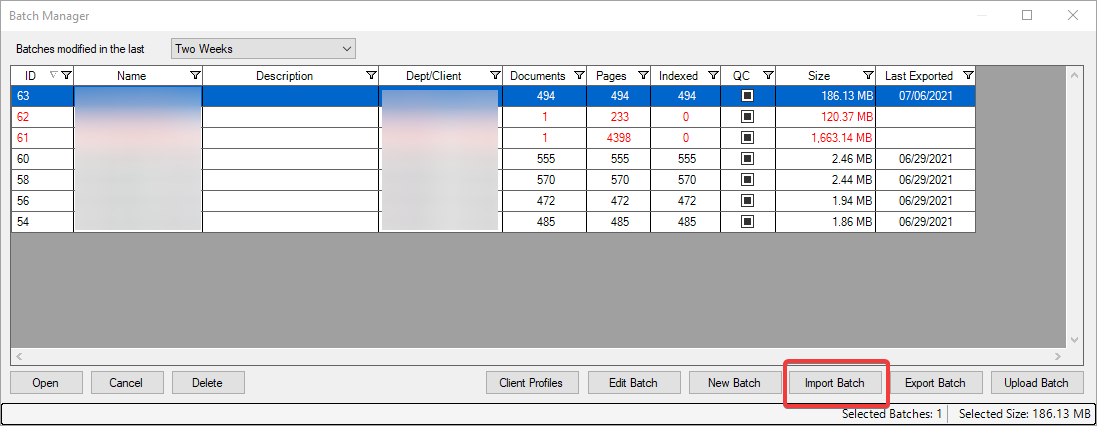
1. Click "Import Batch" from Batch Manager screen.
2a. To import a file, click "Files," click "Browse" to locate the file(s) you wish to import, name the batch, and click "Import."

2b. To import a folder, click "Folders", select the File Type, select the folder you wish to import, name the batch, and click "Import."

File Type: Select PDF or TIFF for the format that is contained in the folder that you wish to import.
New Document (only for TIFF format): We recommend the default "Per each TIFF file."
Delete: If using a dedicated folder for documents that will be imported, we recommend selecting "Delete imported files and empty folders."
Once imported, open the batch and index as you normally would.
C. Best Practices
- Preparation: Ensure all documents are saved to the computer or accessible on a network drive before starting the import process.
- File Type Selection: Correctly identify and select the file type (PDF or TIFF) before importing to avoid format mismatches.
- Batch Labeling: Clearly name each batch during the import process for easy identification and retrieval later.
- Deletion Settings: If importing from a dedicated folder, activate the delete option to automatically clean up imported files and free up storage space.
D. Troubleshooting
- Batch Import Failure: Ensure the file path is correct and that you have the necessary access permissions to the file or folder.
- Incorrect File Type: If files do not import properly, check that the selected file type matches the files in the batch.
- Missing Files Post-Import: Check deletion settings to ensure files aren’t being removed unintentionally. Re-import if needed with different settings.
E. Related Articles
Conclusion
Mastering the import of files into SCScan is essential for efficient document management. By adhering to the outlined steps and best practices, users can streamline the document intake process and prepare their files accurately for indexing. This not only saves time but also enhances the overall management and retrievability of documents within SCScan, leading to better workflow and increased productivity.