
 | ||
Introduction
The Search screen includes a Scan action that lets users add newly scanned pages directly into an existing document. This feature remains available only when a document is selected, ensuring accuracy when adding additional pages to a document.
A. Problem Statement
Users need a way to scan paper pages directly into the correct document while working from the Search screen. The Scan action must be available only after a document is selected and must add the scanned pages to that document—either at the beginning or the end—without changing how users access or use the feature.
B. Solution
The Search screen provides a Scan action that becomes available once a document is selected. When used, it opens the scanning window and guides the user through scanning pages directly into the selected document. After scanning, the pages are automatically added to that document in the chosen position—either appended to the end or prepended to the beginning—so the document is updated immediately without requiring additional steps.
Step 1:
Make sure you have Import enabled as well as Search and Append permissions for the specific document type. Please reach out to your admin to get access to this feature.
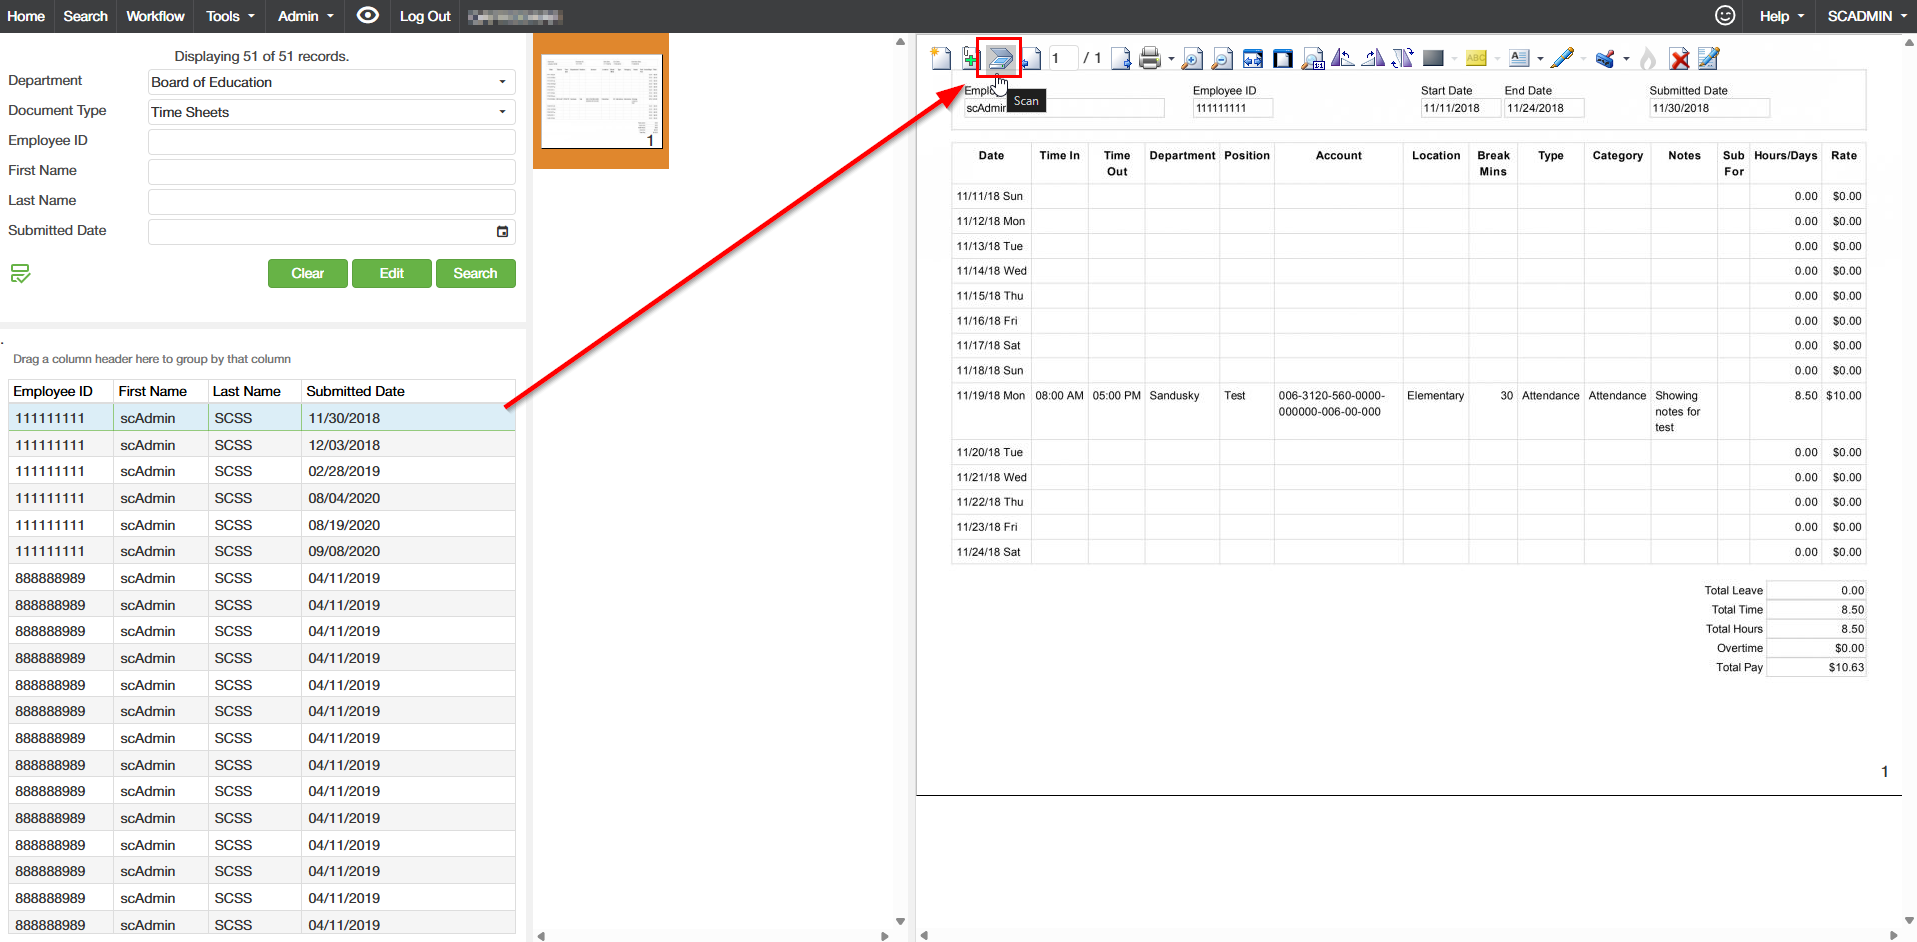
Navigate to Search screen. Provide the department and document type and any other search requirements to find the document you wish to append and or prepend additional documents to. Once the item is selected and the page loads select the Scan icon in the right pan toolbar.
Step 2:
The scan screen popup will open. You can Drag and drop files in the drag and drop location in the bottom left of the popup, or you can select the paper clip icon to add attachments through file explorer. If you have a scanner added you can select the scanner icon to begin scanning pages.
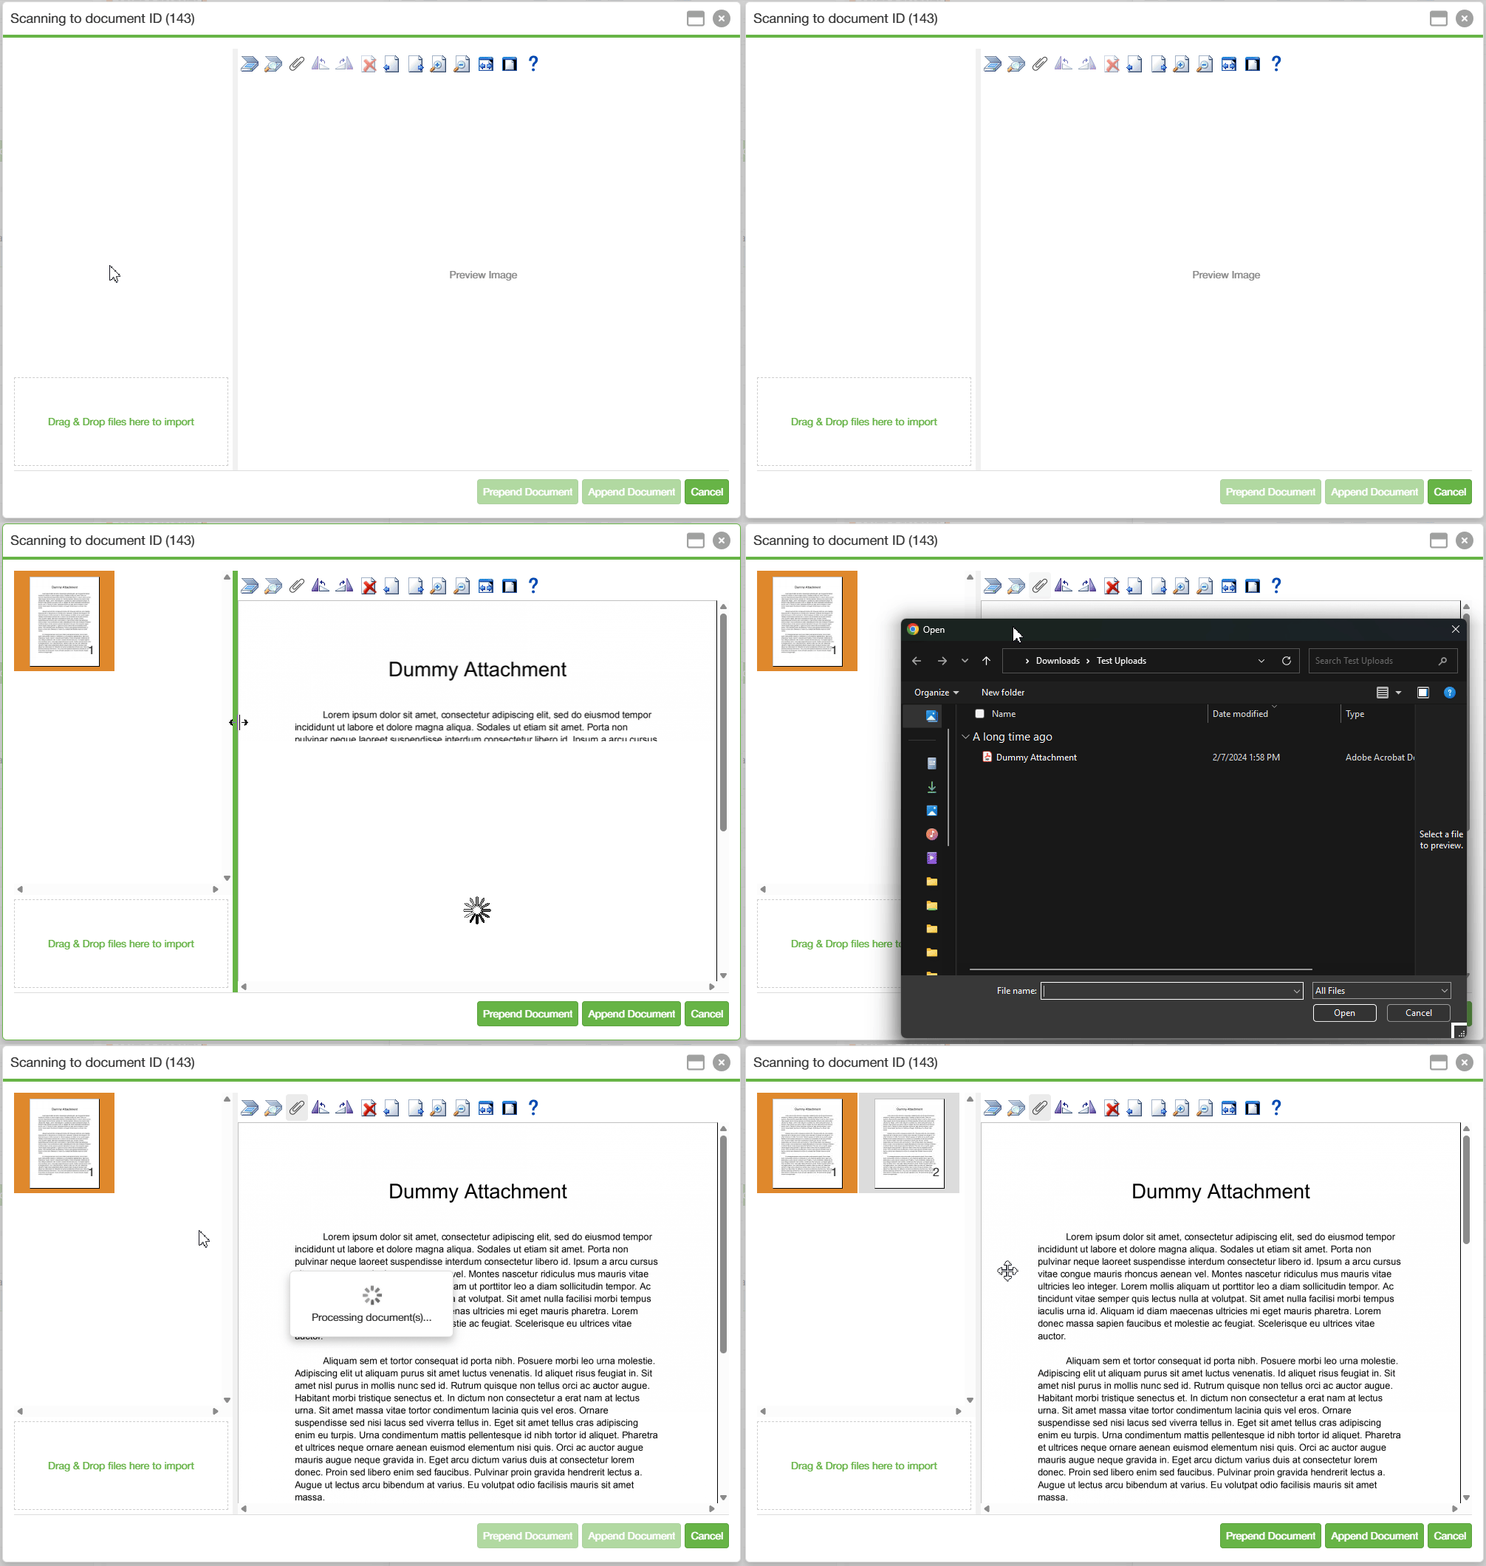
Once all documents are displaying in the image viewer, click the Prepend and or Append document button in the bottom right of the popup.
Prepend Document - will add the images before the selected document on the search screen.
Append Document - will add the images after the selected document on the search screen.
Cancel - A Unsaved changes popup will display asking if you wish to discard the changes and close the popup or if you want to return to scan. Selecting the Discard and Close option will discard any images uploaded and take you back to the search screen of the selected document. Return to Scan will keep your uploaded images and allow you to continue as normal.
If needed you can rotate images, delete images, change the order of images all within the scan popup.
Rotate and delete has two ways to be performed, the buttons in the toolbar and or right click the image and select the option from the context menu. To reorder the images select the image and drag and drop it in the order you wish to have.
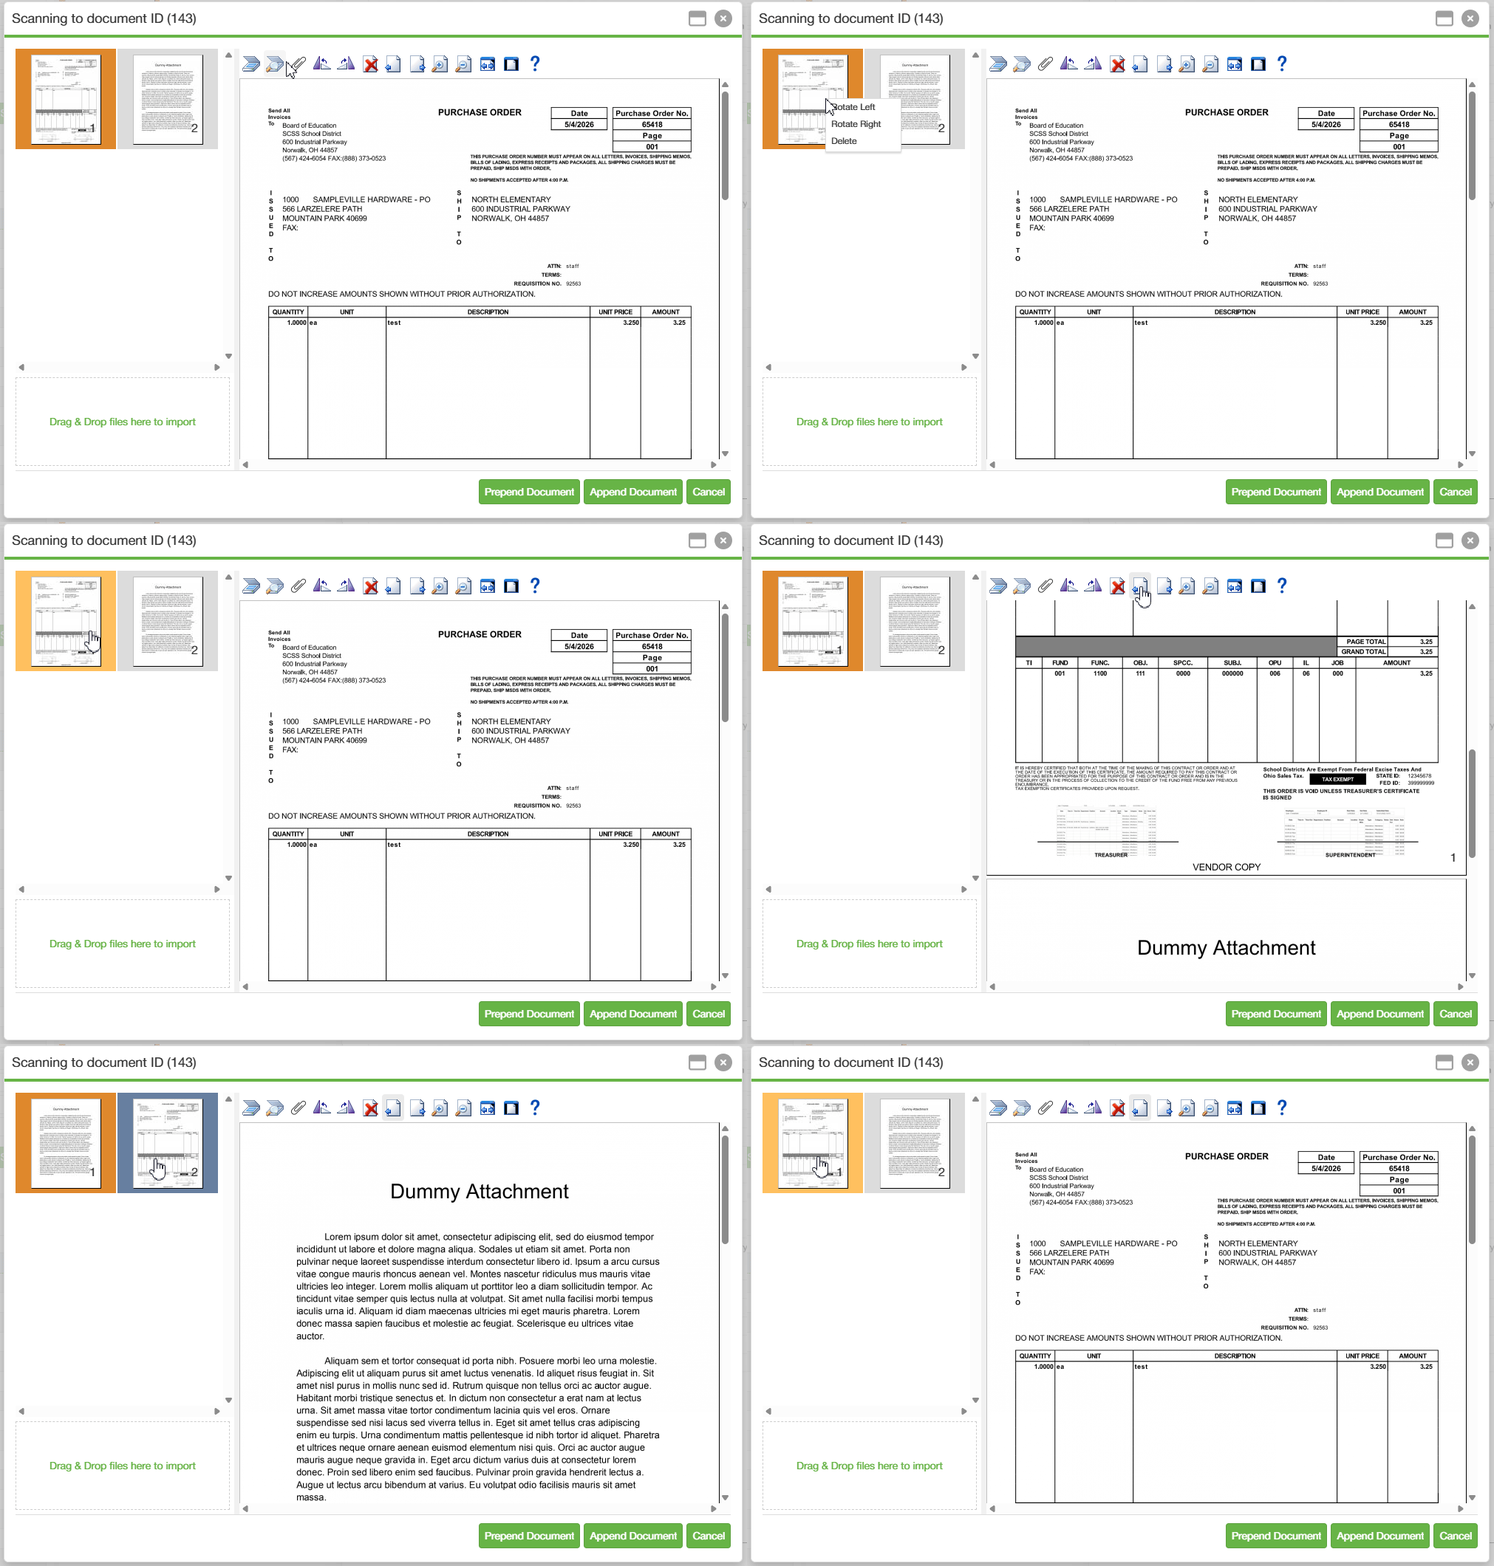
The question mark in the toolbar will open the scan help popup. This will provide instructions on setting up a scanner to work with this application. If you run into any other issues please contact support.
C. Best Practices
To get the best results when scanning from the Search screen, confirm you have selected the correct document before starting. Prepare pages by removing staples, flattening folds, and arranging them in the correct order to reduce the chance of jams or skewed images.
D. Troubleshooting
If the Scan option is unavailable, ensure a document is selected—scanning can only be started when there is an active target document. Please also make sure you have the correct permissions with your admin. If pages did not appear where expected, confirm whether you chose to add them to the beginning or the end of the document.
E. Related Articles
Conclusion
Scanning from the Search screen provides a simple, reliable way to add new pages directly into an existing document as you work. By selecting the correct document first and following a few scanning best practices, you can quickly capture paper content and ensure it is inserted in the right place with minimal effort.