 | ||
Introduction
This article explains how to configure team member access permissions for viewing and printing different types of checks in your system. You will learn how to implement granular security controls that maintain appropriate financial document access while ensuring staff efficiency. These customizable permission settings provide precise control over your organization's sensitive financial information.
A. Problem Statement
Organizations require a flexible permission system that grants appropriate access levels to different types of checks while maintaining security restrictions for unauthorized users. Without proper access controls, sensitive financial information may be exposed to inappropriate personnel, or conversely, authorized staff may be unable to perform essential financial functions efficiently.
B. Solution
Follow these steps to configure and manage check access permissions effectively:
Step 1: Understand Check Types
The system supports two distinct check types:
- AP Checks (Accounts Payable)
- Payroll Checks
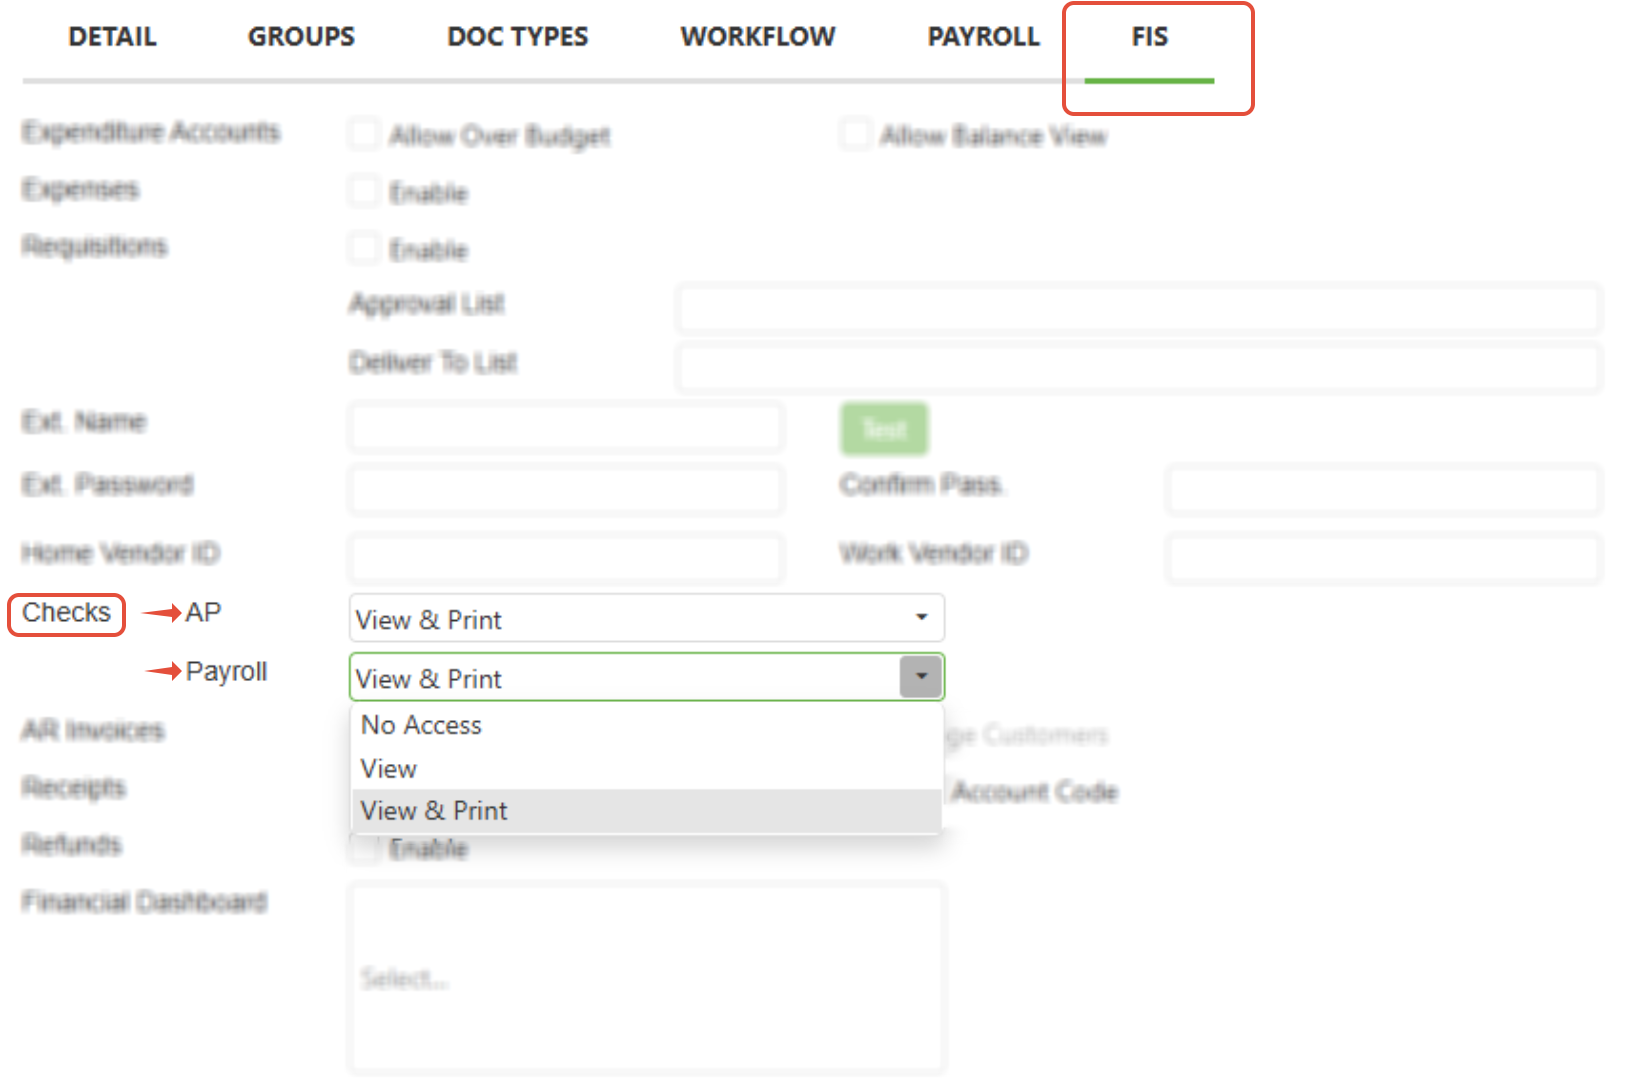
Step 2: Configure Permission Levels
Navigate to Admin > Users > FIS and set permissions for each check type using three available levels:
- No Access: User cannot view or print this check type
- View Only: User can view but not print this check type
- View & Print: User can both view and print this check type
Step 3: Understand Page Accessibility Rules
The Checks page accessibility depends on user permissions:
- The Checks page will be accessible from the Tools menu if the user has at least "View" permissions for at least one check type
- The Checks page will be inaccessible if the user has "No Access" for both check types
Step 4: Configure Mixed Permission Scenarios
When users have different permission levels for the two check types:
- If one check type is set to View & Print while the other is set to View, only checks of the type with "View & Print" permission can be printed
- Checks of the type with "View" permission will still display but cannot be printed
- If one check type is restricted entirely while the other is not, only checks with "View" or "View & Print" will be displayed
NOTE: Remember that Admin rights do not automatically grant check access permissions. The ability to view or print checks is controlled exclusively by the settings per check type on the FIS tab in user settings.
C. Best Practices
- Regular Permission Audits: Review user permissions quarterly or when staff roles change to maintain optimal security and ensure access remains appropriate
- Role-Based Assignment: Create standardized permission templates based on job functions (accounting staff, managers, executives) for consistent access control
D. Troubleshooting
- User cannot see Checks page in Tools menu: Verify user has at least "View" permission for one check type, check user role assignments, refresh browser and retry
- Admin user cannot access checks despite admin rights: Check FIS tab permissions specifically, admin rights don't override check-specific permissions, configure appropriate check type access
- User sees some checks but not others: Review mixed permission settings, verify check type classifications, ensure proper permission levels are set for both AP and Payroll
E. Related Articles
Conclusion
Implementing granular check access permissions provides your organization with the essential balance between security and operational efficiency. By configuring appropriate permission levels for AP and Payroll checks, you can ensure sensitive financial information remains protected while enabling authorized personnel to perform their duties effectively. Take action now by reviewing your current user permissions and implementing the recommended best practices to optimize your financial document security.