 | ||
Introduction
The User's page has been enhanced to streamline the process of granting permissions to individual users and groups for specific pages and modules on the site. This improvement simplifies access control and enhances user management.
A. Problem statement
Clients require a system that allows them to selectively grant permissions and access to specific employees within their school system.
B. Solution
We've introduced a new 'Groups' tab under the Users page, enabling Admins to assign user permissions based on predefined groups. These groups are easily identifiable by their distinctive orange highlight or border. Additionally, Admins have the flexibility to assign permissions to specific modules via checkboxes, offering tailored access for each user. This feature enhances the customization and management of user permissions on the platform.
Assigning Group-Based Permissions to a User:
Step 1: Open the profile of the user to whom you want to assign group permissions and locate the 'Group' tab.
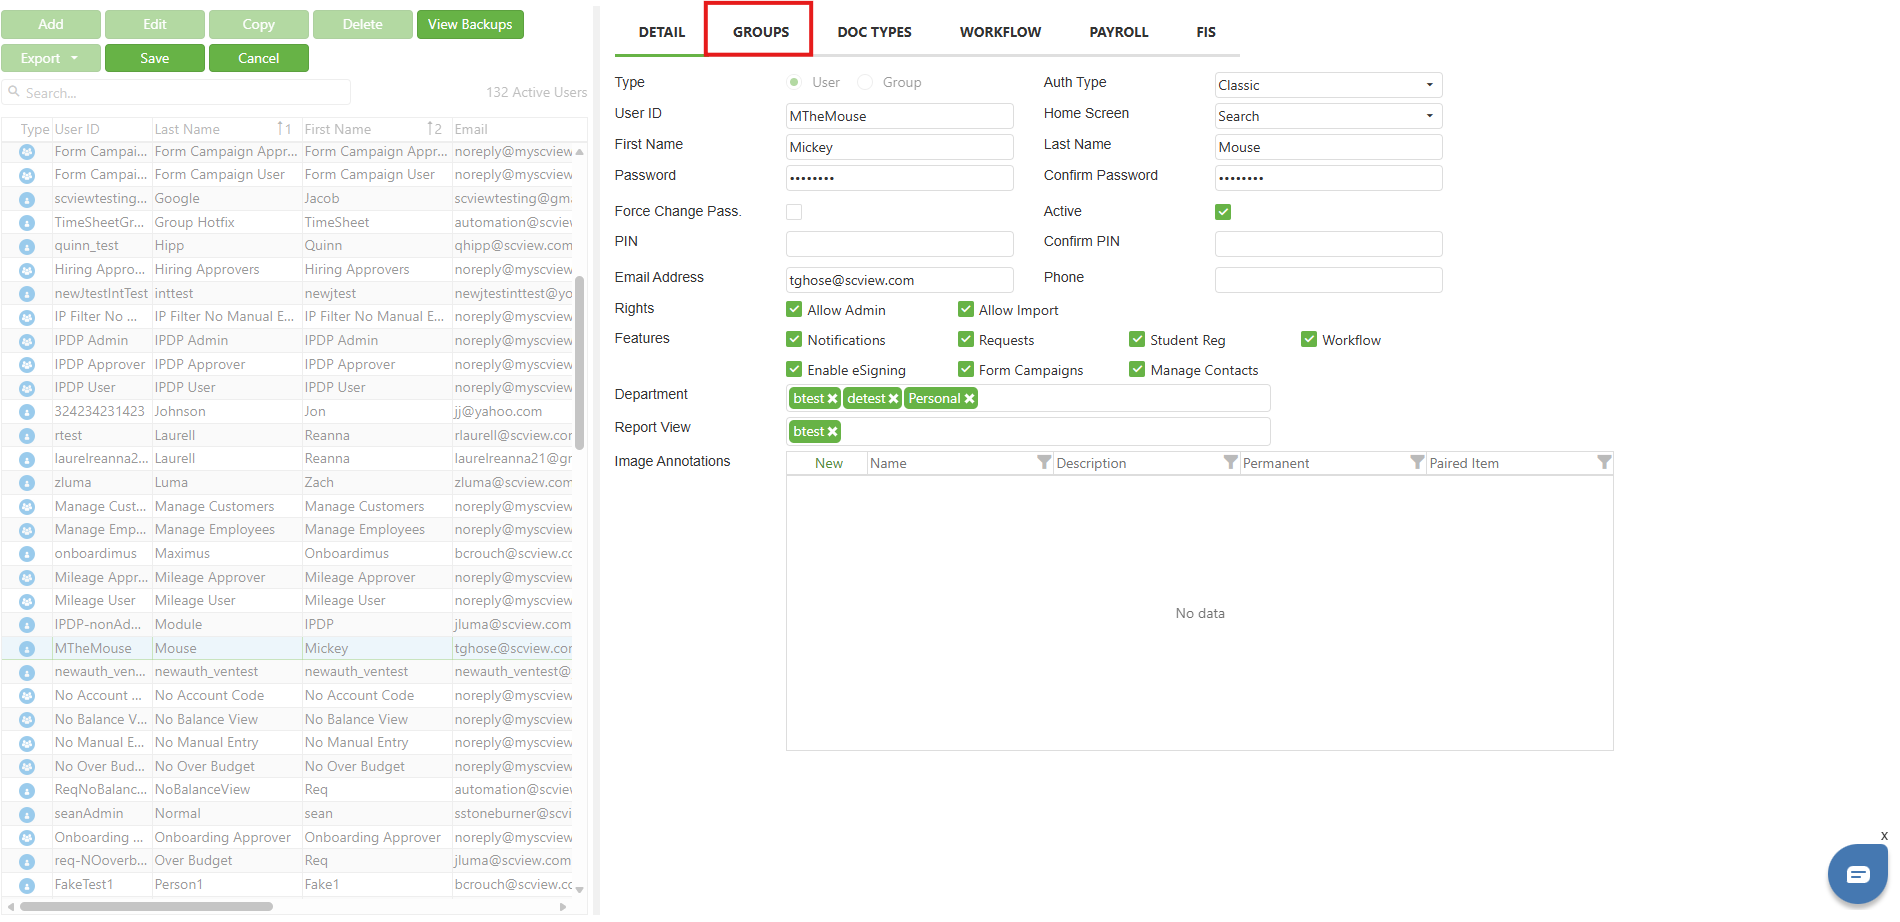
Step 2: Select the appropriate group to associate with the user.

Step 3: Confirm the changes by clicking 'Save.'

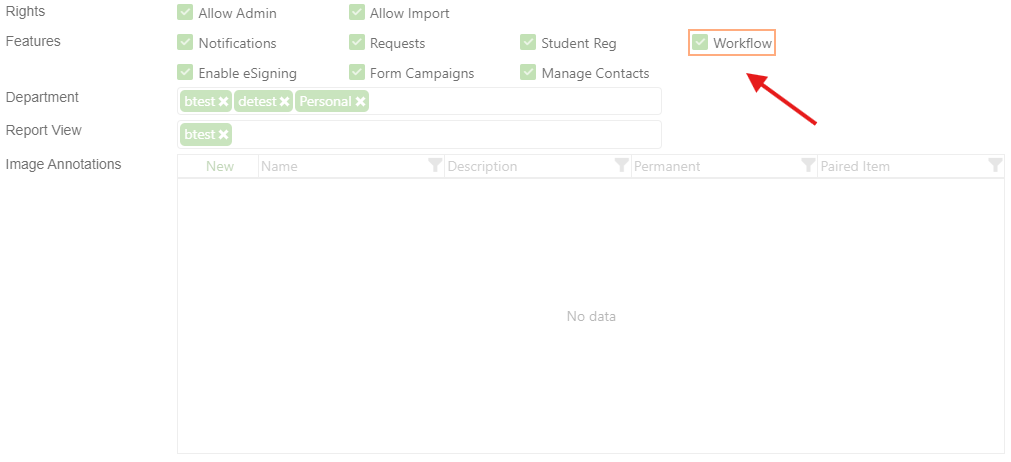
Step 4: Ensure that an orange box appears around the modules linked to the selected group, indicating successful permission assignment.
Assigning Individual Module Permissions to a User:
Step 1: Navigate to the profile of the user and identify the specific module you wish to assign, found under tabs such as Details, Doc Types, Payroll, or FIS.

Step 2: Check the box adjacent to the module to grant access.

Step 3: Save your settings to apply the changes.
If you add a user to a module via the 'Groups' tab and by checking the box, the
feature will be highlighted with an orange border and the box will remain checked.
C. Best Practices
Assigning Group Permissions to a User:
- Select the user to whom you wish to assign group permissions, and open their profile.
- Navigate to the 'Group' tab within their profile.
- Choose the appropriate group to which the user should belong.
- Save the changes to update the user’s profile.
- Verify that an orange box appears around the modules corresponding to the assigned group, confirming that the permissions are correctly set.
Assigning Individual Module Permissions to a User:
- Select the user and access their profile.
- Locate the specific feature you wish to assign under the relevant tabs, such as Details, Doc Types, Payroll, or FIS.
- Grant access by checking the box next to the desired module.
- Save the changes to ensure the individual permissions are updated.
D. Troubleshooting
Assigning Group Permissions to Users:
- Selection Issues: Refresh the page if the group doesn’t appear for selection.
- Saving Changes: Always click 'Save' after modifications; clear cache if issues persist.
- Incorrect Permissions: Confirm the correct group is assigned and check for overlapping group permissions if incorrect modules are highlighted.
Assigning Individual Modules:
- Checkbox Issues: Check if there are prerequisite permissions. Ensure no software glitches by updating to the latest version.
- Access Issues: Look for conflicting permissions and perform a system restart if necessary.
E. Related articles
Conclusion
In conclusion, managing user permissions and group settings effectively ensures that each team member has appropriate access to necessary resources, enhancing both security and efficiency within your organization. By following the streamlined steps outlined for creating user groups, assigning permissions, and troubleshooting, you can maintain a controlled and functional permissions environment. Regularly updating your software, keeping a clear organizational structure, and addressing any issues promptly with these guidelines will mitigate complications and ensure your system operates smoothly. If challenges persist, don't hesitate to reach out to your support team for more specific assistance.